はじめに
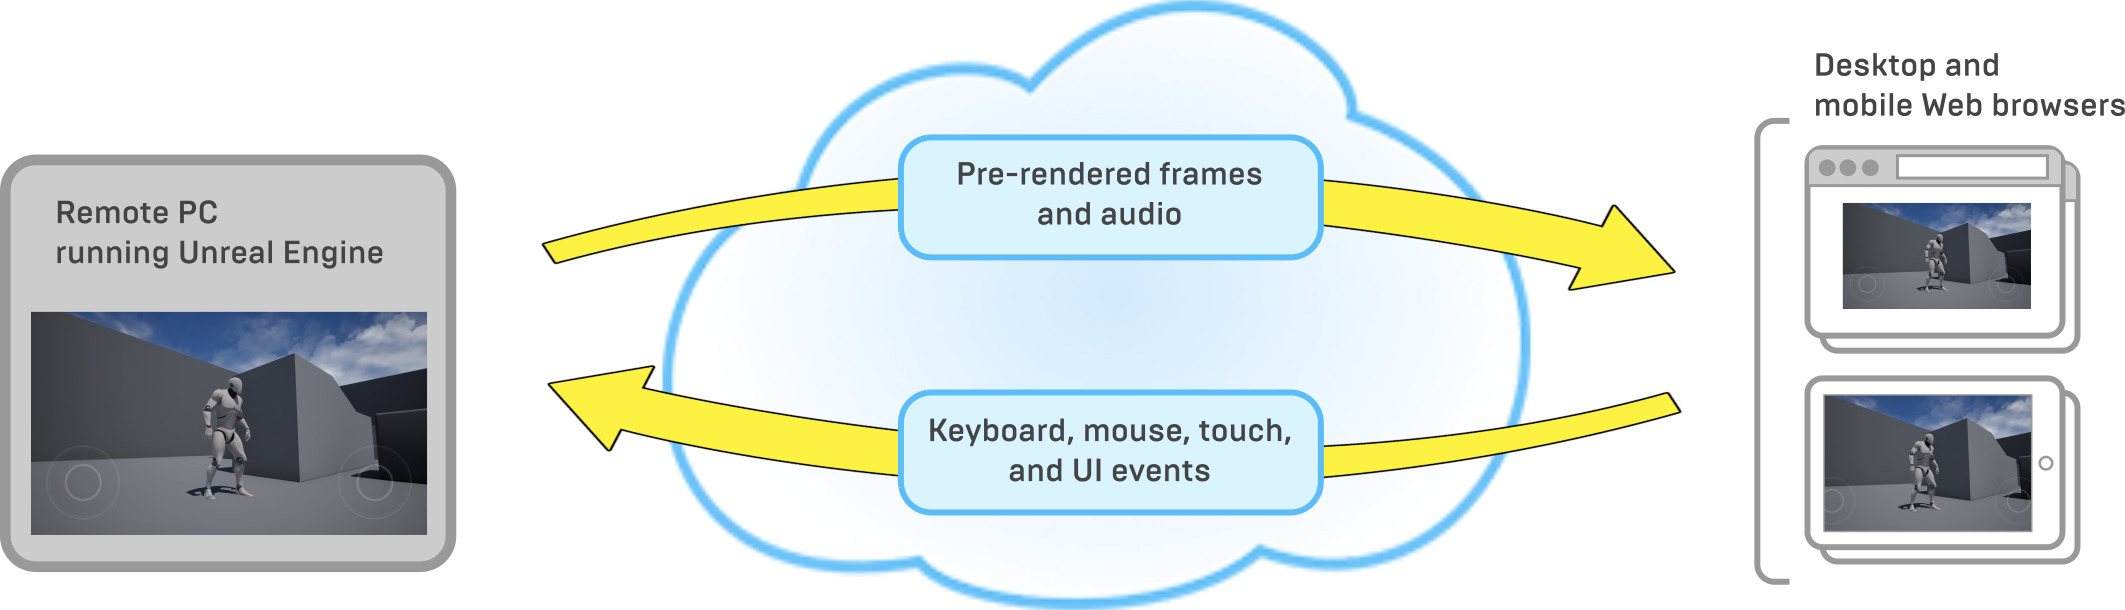
Pixel StreamingはリモートのUnreal Engineの画面をPCやサーバーから配信し、デスクトップやモバイルブラウザで見ることができる技術(プラグイン)です。
本来はAzureでは対応していませんが配信できるようにしたいと思います。
https://docs.unrealengine.com/ja/Platforms/PixelStreaming/index.html
Unreal Engineは事前にインストールは完了していることが前提です。
https://level69.net/archives/27428
Visual Studioとnode.jsのインストールが必要となります。
Visual Studioのインストール
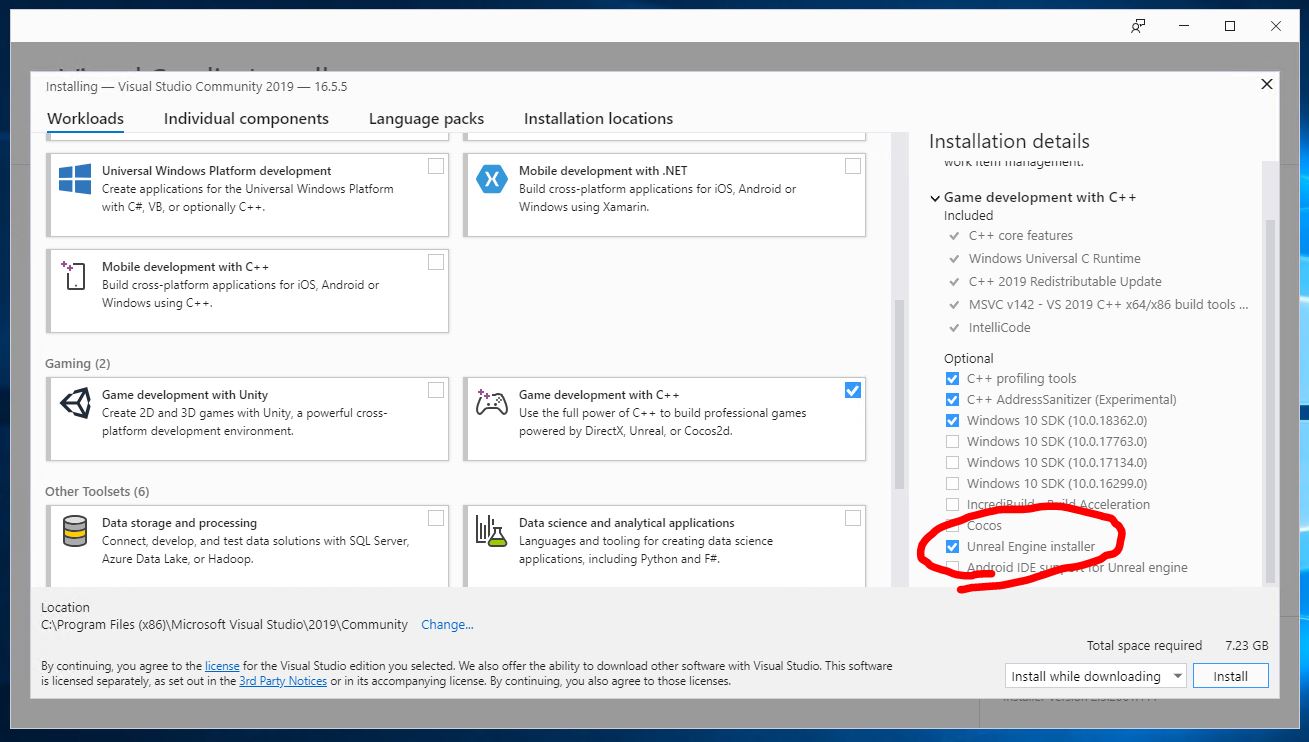
C++の開発ツールを必要とするためVisual Studioにインストールが必要となります。
Communityバージョンをインストールします。
https://docs.unrealengine.com/ja/Programming/Development/VisualStudioSetup/index.html
https://visualstudio.microsoft.com/
Game Development with C++を選択し、Unreal Engine installerにチェックを入れてインストールします。
まぁ一回ぐらい起動しておきましょう。
これでVisual Studioの準備は完了です。
node.jsをインストール
node.jsも必要です。
Pixel Streamingのインストールと設定
Pixel StreamingはUnreal Engineのプラグインとして実行されます。
インストール、設定は下記を参考に進めていきます。
https://docs.unrealengine.com/ja/Platforms/PixelStreaming/PixelStreamingIntro/index.html
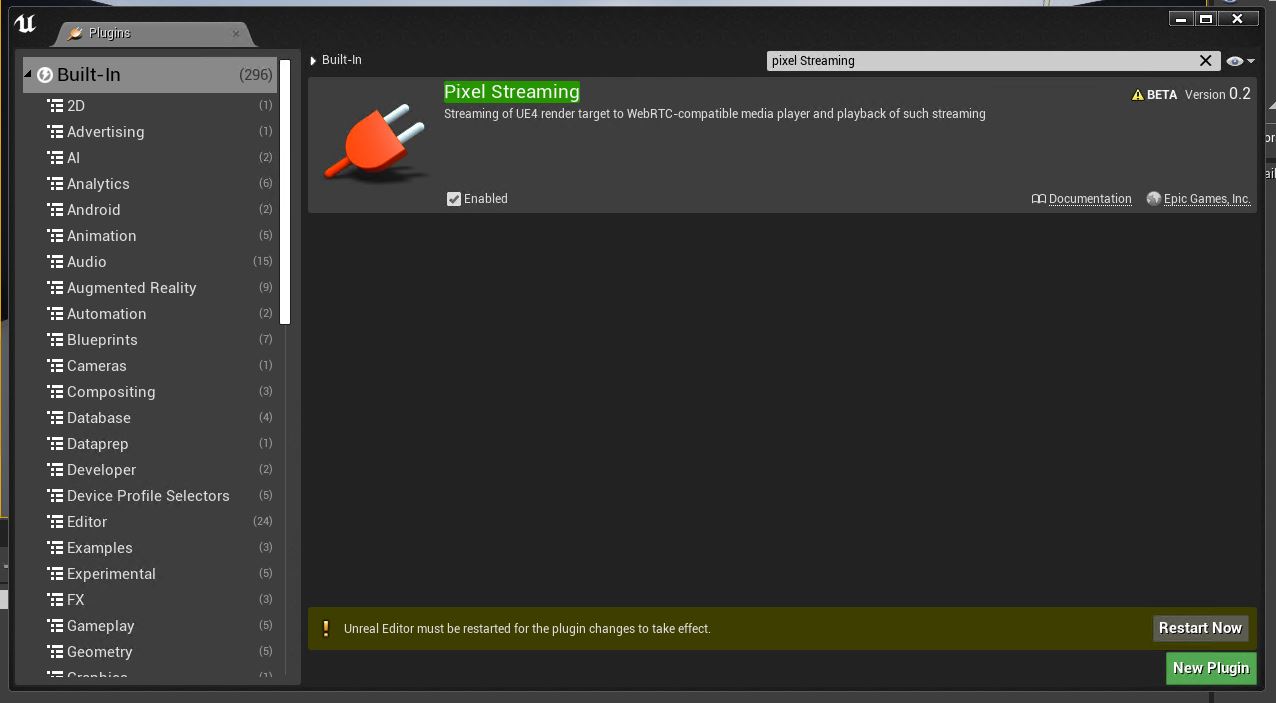
EditからPluginsを開きPixel Streaming にEnabledにチェックを入れます。ベータである確認画面が出ますが進めます。そして有効にするためUnreal Engineを再起動します。
EditからProject Settingsを開きます。
項目EnginのInputを引きます。Always Show Touch Interface にチェックを入れます。
チェック入れるだけで反映されます。保存ボタンはありません。

EditからEditor Preferencesを開きます。
項目 Level EditorのPlayでAdditional Launch Parameters に下記の値を入力します。
-AudioMixer -PixelStreamingIP=localhost -PixelStreamingPort=8888

以上で設定は完了です。
Pixel Streamingを起動する準備をする
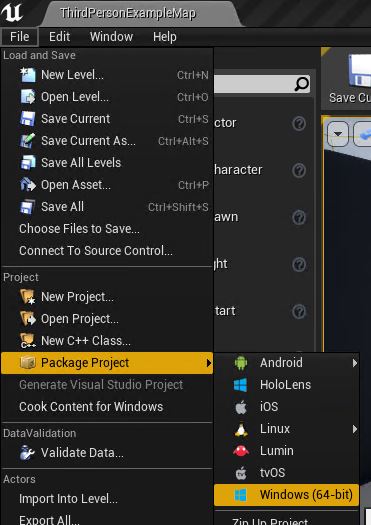
先ず最初にパッケージ化します。Visual Studioがインストールされていないとエラーになります。
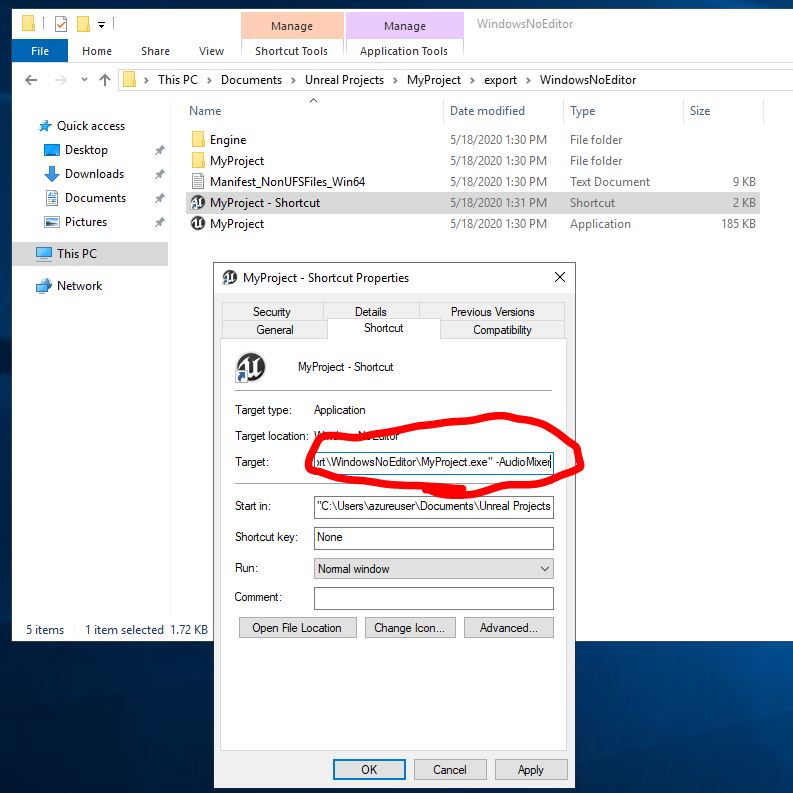
起動するためのショートカットを作成します。
オプションに -AudioMixer -PixelStreamingIP=localhost -PixelStreamingPort=8888 を追加します。
(-RenderOffScreenを追加するとバックグラウンドで動作するようになります)
起動スクリプトの編集をします。
通常は下記のフォルダ(インストール場所による)
C:\Program Files\Epic Games\UE_4.25\Engine\Source\ThirdParty\WebRTC\rev.23789\programs\Win64\VS2017\release
AWSように用意されているスクリプト
Start_AWS_TURNServer.ps1
を編集します(編集前に読み込み専用を外します)。
$LocalIp = Invoke-WebRequest -Uri "http://169.254.169.254/latest/meta-data/local-ipv4" をコメントアウトしてプライベートIPを直接指定します。
$LocalIp "プライベート IP アドレス"
function AddUser{
    param(
    $realm,
    $user,
    $pass,
    $auth_file,
    [switch]$append)

    $md5 = new-object -TypeName System.Security.Cryptography.MD5CryptoServiceProvider
    $utf8 = new-object -TypeName System.Text.UTF8Encoding
    $hash = [System.BitConverter]::ToString($md5.ComputeHash($utf8.GetBytes("$user" + ":$realm" + ":$pass")))
    $hash = $hash.ToLower() -replace '-', ''

    if($append){
        "$user=$hash" | Out-File -FilePath $auth_file -Append -Encoding ascii
    } else {
        "$user=$hash" | Out-File -FilePath $auth_file -Encoding ascii
    }

}

#$LocalIp = Invoke-WebRequest -Uri "http://169.254.169.254/latest/meta-data/local-ipv4"
$LocalIp "プライベート IP アドレス"
Write-Output "Private IP: $LocalIp"


$AuthFile = "turnserver_auth.txt"
$Realm = "PixelStreaming"
$ProcessExe = ".\turnserver.exe"
$Arguments = "0.0.0.0:19303 $LocalIp $Realm $AuthFile"

$TurnUsername = "PixelStreamingUser"
$TurnPassword = "Another TURN in the road"

AddUser $Realm $TurnUsername $TurnPassword $AuthFile


Write-Output "Running: $ProcessExe $Arguments"
Start-Process -FilePath $ProcessExe -ArgumentList $Arguments
通常は下記のフォルダ(インストール場所による)
(編集前に読み込み専用を外します)
C:\Program Files\Epic Games\UE_4.25\Engine\Source\Programs\PixelStreaming\WebServers\SignallingWebServer
$PublicIp = Invoke-WebRequest -Uri "http://169.254.169.254/latest/meta-data/public-ipv4" をコメントアウトして直接パブリック IP アドレスを入力します。
$PublicIp = "パブリック IP アドレス"
# Copyright 1998-2018 Epic Games, Inc. All Rights Reserved.

#$PublicIp = Invoke-WebRequest -Uri "http://169.254.169.254/latest/meta-data/public-ipv4"
$PublicIp = "パブリック IP アドレス"

Write-Output "Public IP: $PublicIp"

$peerConnectionOptions = "{ \""iceServers\"": [{\""urls\"": [\""stun:" + $PublicIp + ":19302\"",\""turn:" + $PublicIp + ":19303\""], \""username\"": \""PixelStreamingUser\"", \""credential\"": \""Another TURN in the road\""}] }"

$ProcessExe = "node.exe"
$Arguments = @("cirrus", "--peerConnectionOptions=""$peerConnectionOptions""", "--publicIp=$PublicIp")
# Add arguments passed to script to Arguments for executable
$Arguments += $args

Write-Output "Running: $ProcessExe $Arguments"
Start-Process -FilePath $ProcessExe -ArgumentList $Arguments -Wait -NoNewWindow
以上で編集は完了です。
Pixel Streamingを起動する
事前にAzure側で80のポートをNSGで開けておきます。
Windows Firewallも設定しておきましょう。
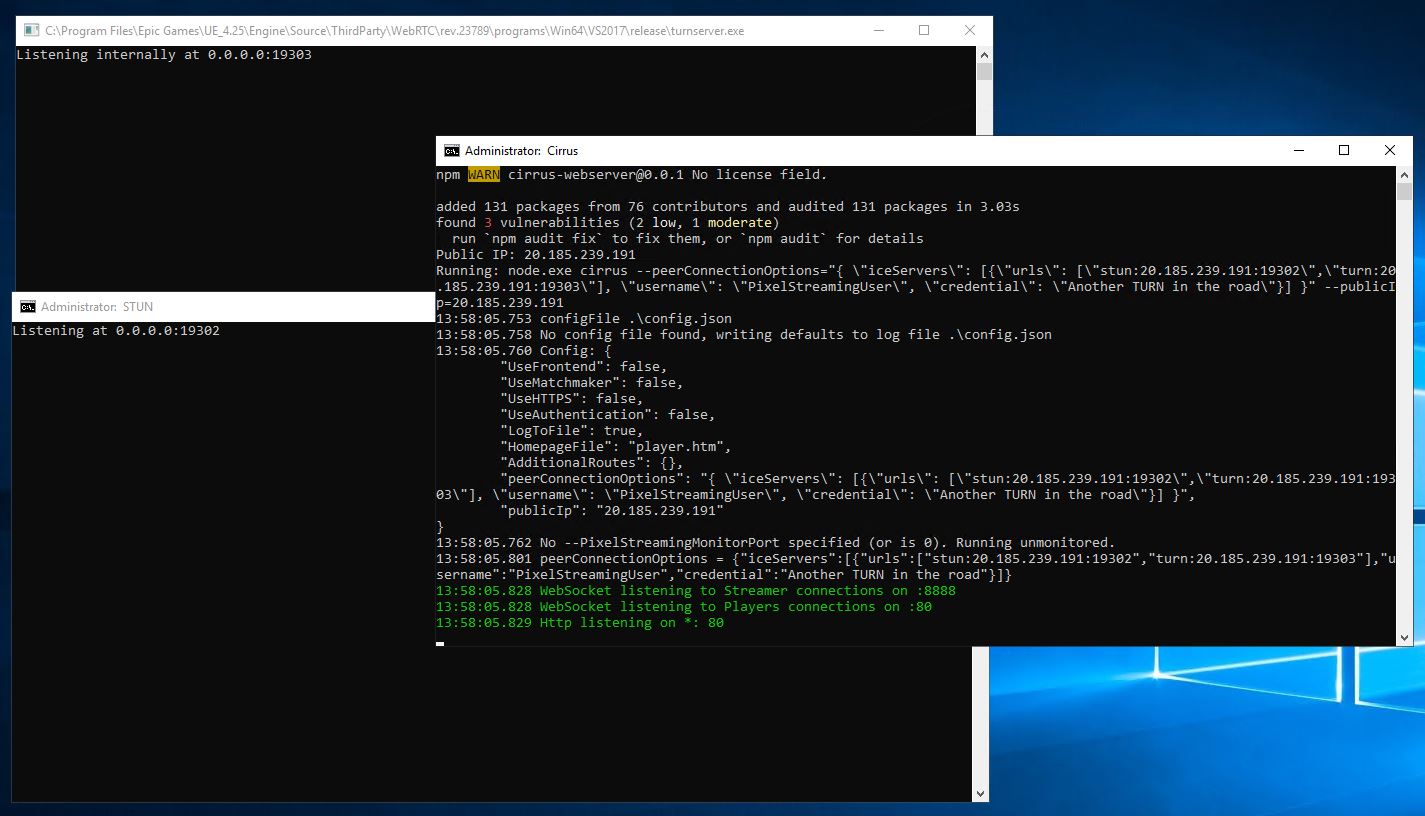
フォルダ
C:\Program Files\Epic Games\UE_4.25\Engine\Source\ThirdParty\WebRTC\rev.23789\programs\Win64\VS2017\release
Start_AWS_TURNServer.bat
Start_STUNServer.bat
2つ起動します。
フォルダ
C:\Program Files\Epic Games\UE_4.25\Engine\Source\Programs\PixelStreaming\WebServers\SignallingWebServer
runAWS_WithTURN.bat
を起動します。
起動を確認したらパッケージを編集したショートカットから起動します。
これでAzure側の準備は完了です。
動作確認
ブラウザからパブリックIPにアクセスします。
クリックすると開始します。

ブラウザがわでマウス、キーボードで操作するとAzure側が連動することが分かります。
まとめ
AzureでもPixel Streamingで配信することができました。まだ、ベータ版ですがなんか面白ので遊んでみてください。