はじめに
今回はIot Platformが動かしてみたいと思います。
チュートリアル通りにやると思ったんですが日本語ドキュメントがまだ更新されておらずハマりポイントが多いため、中国語(本家)のドキュメントを参考にしましょう。
Alibaba Cloudは進化が激しいようなので日本語ドキュメントより中国語(本家)を参考にする方が確実だと思います。
Internationalも更新は間に合ってないように見受けられます。
クイックスタートを参考に進めていきます。
https://help.aliyun.com/document_detail/73705.html
今回はサンプルを使って進めていきます。サンプルではライトのスイッチです。
下記を行いIot Platformへ接続できるかを確認したいと思います。
・プロダクトの作成
・デバイスの登録
プロダクトの作成
IoT Platformの画面を開きます。

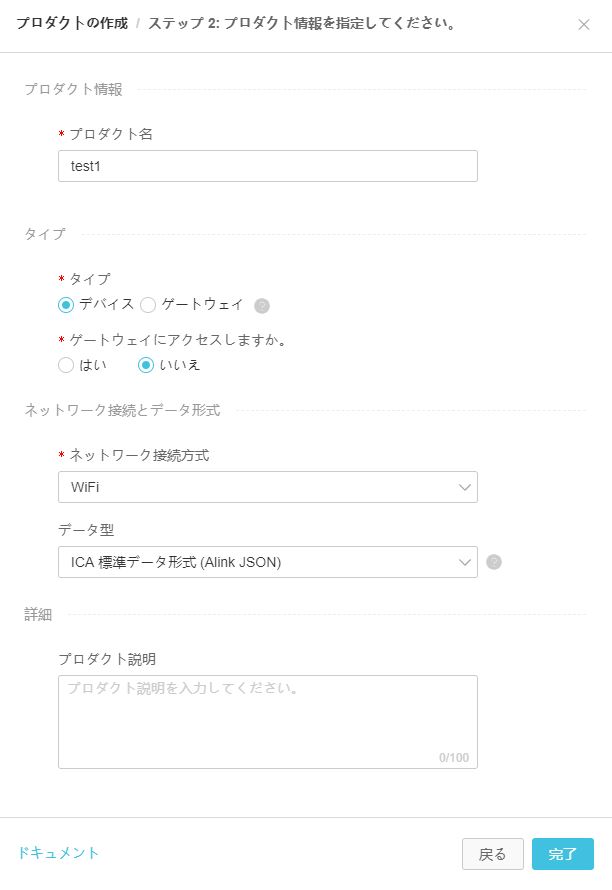
プロダクトの作成を押下しPro Editionを選択します。

ここではプロダクト名だけ決めてほかはそのままです。
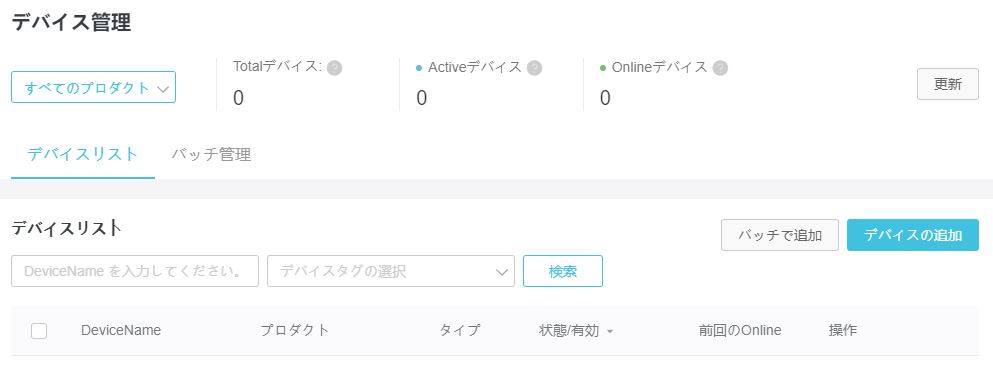
リストに表示されますがデバイス数が0です。
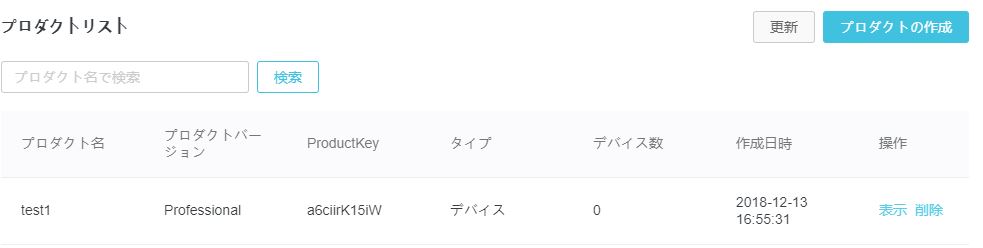
表示を開き、機能の定義を行います。
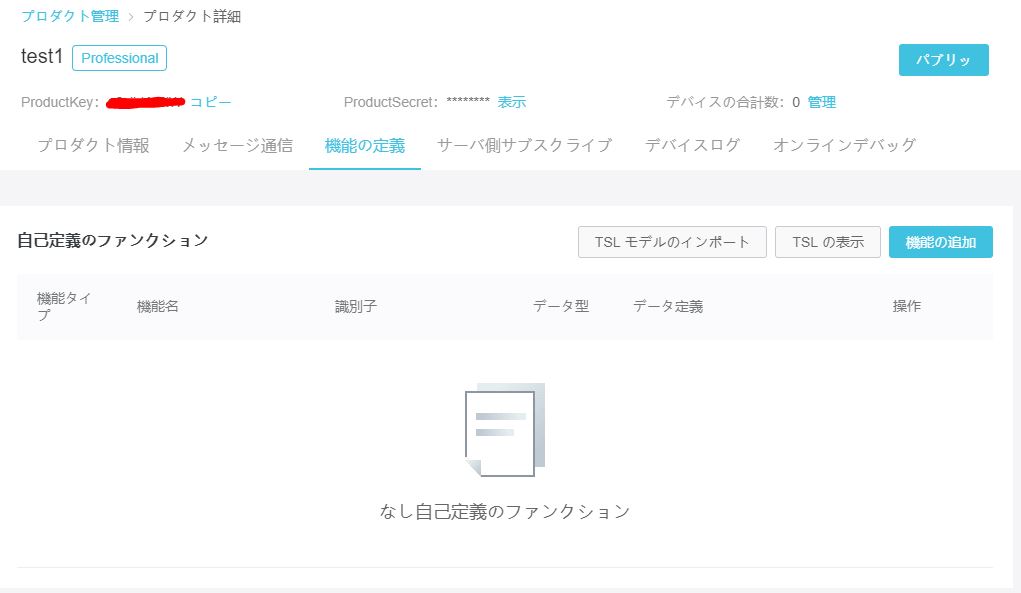
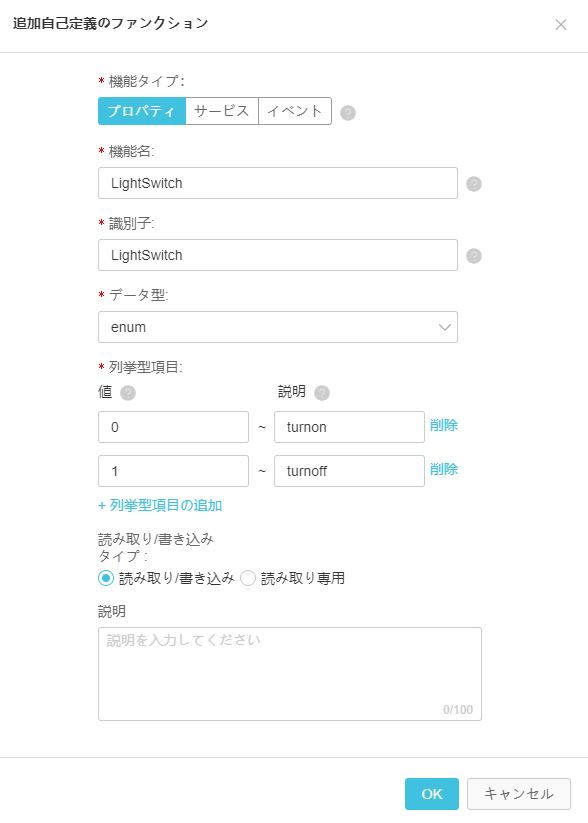
最初にプロパティを作成します。
それぞれ入力します。
0でスイッチON、1でスイッチOFFです。
同様にサービスを作成します。
それぞれ入力します。
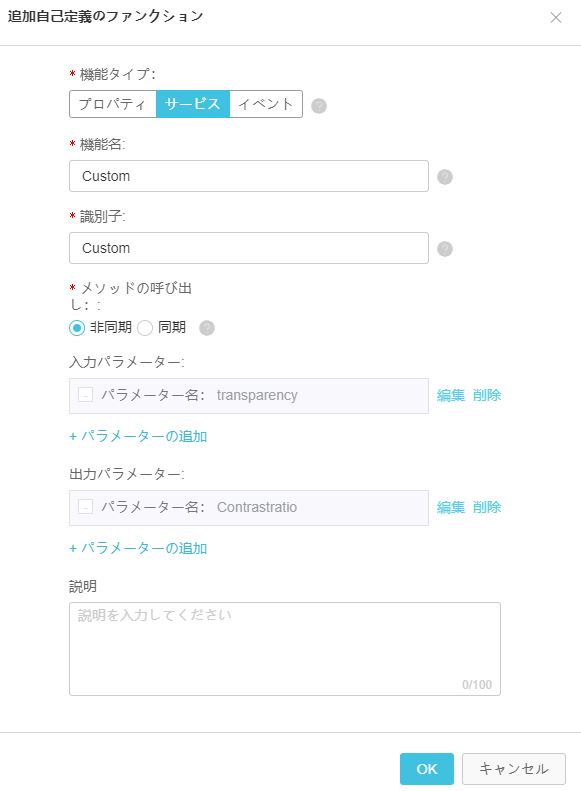
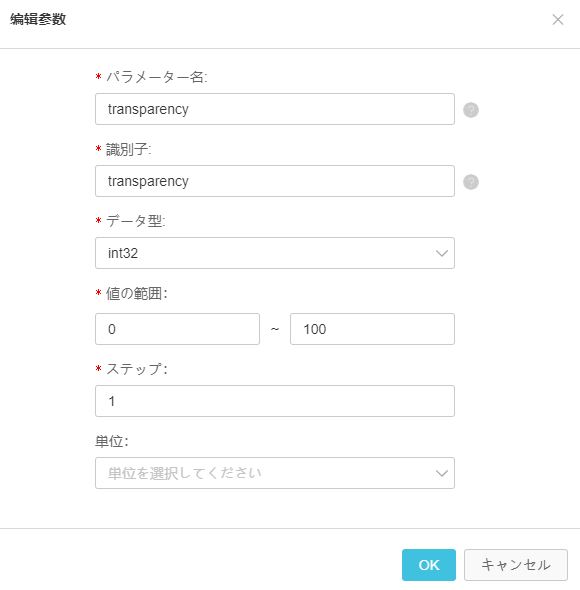
入力パラメーター(透明度)
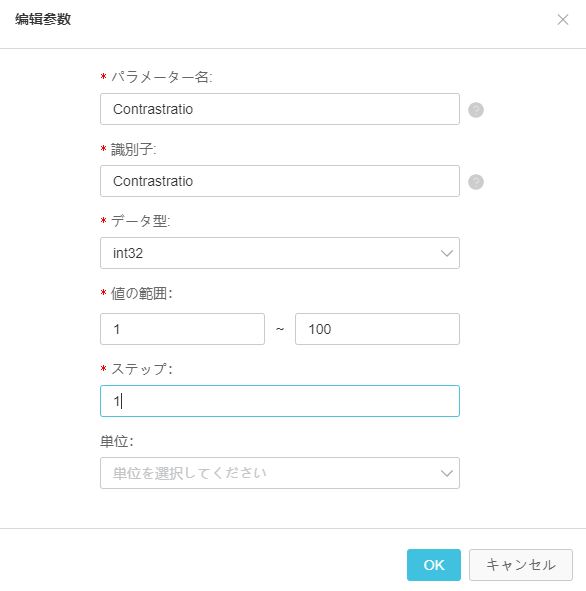
出力パラメーター(コントラスト比)
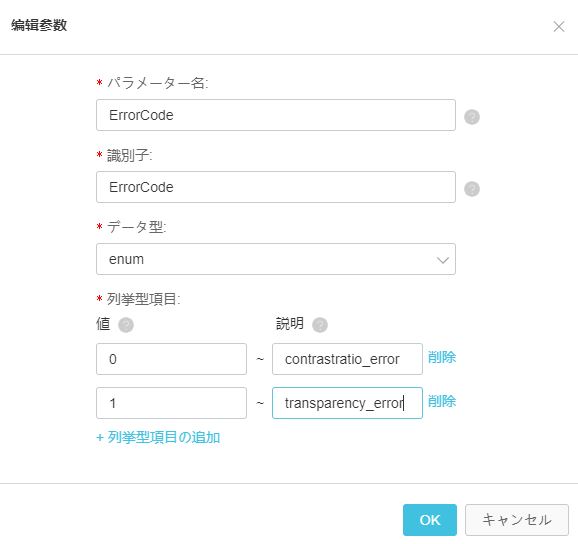
同様にイベントを登録します。
Errorイベントです。

それぞれのエラーコードを登録します。
これでIot Platform側の設定は完了です。
次にデバイス登録してみます。
デバイスの登録
デバイスの登録といってもサンプルを利用しサーバーの上から接続します。
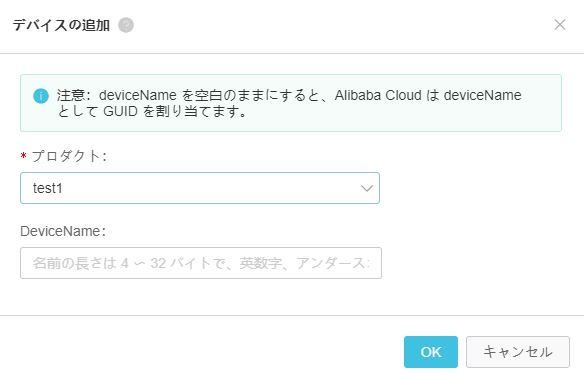
最初にデバイスの追加を行います。
プロダクトを選択します。
DeviceNameは空です。
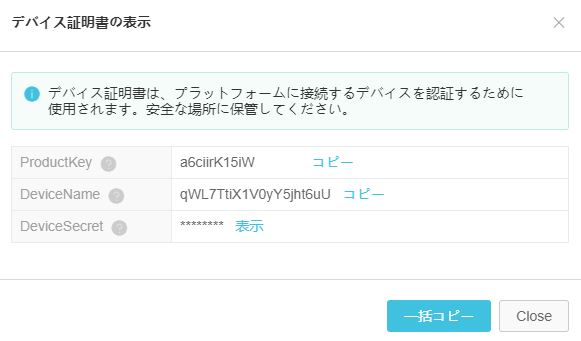
接続に必要な証明書の情報が発行されます。
コピーしておきます。
今回はECSを利用しています。
また今回はC言語SDKを使用します。SDKは64bit Ubuntu16.04を推奨しています。
コンパイルが必要なのでmake等いれます。
apt-get install -y build-essential make git gcc
次にサンプル https://github.com/aliyun/iotkit-embedded/archive/v2.3.0.zip をダウンロードします。
wget https://github.com/aliyun/iotkit-embedded/archive/v2.3.0.zip
unzipで解凍します。ただしunzipはインストールが必要です。
apt install unzip
サンプルの中にあるPRODUCT_KEY 、DEVICE_NAME 、DEVICE_SECRETを先ほどコピーしたキーに書き換えます。
PRODUCT_SECRETは無視してください。
vi iotkit-embedded-2.3.0/examples/linkkit/linkkit_example_solo.c
// for demo only
#define PRODUCT_KEY      "xxxxxxxxxxxxxxxxxx"
#define PRODUCT_SECRET   "7jluWm1zql7bt8qK"
#define DEVICE_NAME      "xxxxxxxxxxxxxxxxxxxx"
#define DEVICE_SECRET    "xxxxxxxxxxxxxxxxxxxxxxxxxxxxxxxxxxx"
ここから重要です。
今回は日本のRegionに作成しています。
その為、IoT Platformのエンドポイントがサンプルと異なり変更が必要となります。
変更前
int domain_type = IOTX_CLOUD_REGION_SHANGHAI;
変更後
int domain_type = IOTX_CLOUD_REGION_JAPAN;
たぶん日本以外もここら辺に定義されています。それぞれのリージョンで変更してください。
src/sdk-impl/sdk-impl_internal.h
#define DYNAMIC_REGISTER_REGION_SHANGHAI            "https://iot-auth.cn-shanghai.aliyuncs.com/auth/register/device"     /* shanghai */
#define DYNAMIC_REGISTER_REGION_SOUTHEAST           "https://iot-auth.ap-southeast-1.aliyuncs.com/auth/register/device"  /* singapore */
#define DYNAMIC_REGISTER_REGION_NORTHEAST           "https://iot-auth.ap-northeast-1.aliyuncs.com/auth/register/device"  /* japan */
#define DYNAMIC_REGISTER_REGION_US_WEST             "https://iot-auth.us-west-1.aliyuncs.com/auth/register/device"       /* us west */
#define DYNAMIC_REGISTER_REGION_US_EAST             "https://iot-auth.us-east-1.aliyuncs.com/auth/register/device"       /* us east */
#define DYNAMIC_REGISTER_REGION_EU_CENTRAL          "https://iot-auth.eu-central-1.aliyuncs.com/auth/register/device"    /* german */
ではコンパイルします。
make distclean
make
SELECTED CONFIGURATION:

VENDOR :   ubuntu
MODEL  :   x86


CONFIGURE .............................. [examples]
CONFIGURE .............................. [src/infra/log]
CONFIGURE .............................. [src/infra/system]
CONFIGURE .............................. [src/infra/utils]
CONFIGURE .............................. [src/protocol/alcs]
CONFIGURE .............................. [src/protocol/coap/cloud]
CONFIGURE .............................. [src/protocol/coap/local]
CONFIGURE .............................. [src/protocol/http]

~~~~~~~~

    | 5.98% | src/services/ota                    | 15867     | 4         | 4          | 0      |
    | 4.74% | src/infra/system                    | 12577     | 664       | 184        | 480    |
    | 2.29% | src/services/linkkit/cm             | 6090      | 56        | 56         | 0      |
    | 1.09% | src/infra/log                       | 2893      | 592       | 0          | 592    |
    | 0.59% | src/services/linkkit/dev_reset      | 1574      | 11        | 11         | 0      |
    |-------|-------------------------------------|-----------|-----------|------------|--------|
    |  100% | - IN TOTAL -                        | 266591    | 3827      | 2483       | 1344   |
実行してみます。
./output/release/bin/linkkit-example-solo
実行するとCloud Connectedとでて接続できたことが分かります。
[dbg] IOT_MQTT_Subscribe_Sync(3382): success!!
[inf] dm_client_subscribe(76): Subscribe Result: 24
[inf] iotx_dm_subscribe(203): Devid 0 Sub Completed
[inf] _iotx_linkkit_event_callback(223): Receive Message Type: 10
[inf] _iotx_linkkit_event_callback(225): Receive Message: {"devid":0}
[dbg] _iotx_linkkit_event_callback(287): Current Devid: 0
user_initialized.325: Device Initialized, Devid: 0
[inf] _iotx_linkkit_event_callback(223): Receive Message Type: 0
user_connected_event_handler.65: Cloud Connected

~~~~~~~~~~~~~~~~~~~~~~~~~~~~~~~~~~~~~~~~~~~~~~~~~~~~~~~~~~~~~~~

user_report_reply_event_handler.300: Message Post Reply Received, Devid: 0, Message ID: 6, Code: 200, Reply: NULL
[inf] dm_msg_request(206): DM Send Message, URI: /sys/a6ciirK15iW/qWL7TtiX1V0yY5jht6uU/thing/event/property/post, Payload: {"id":"7","version":"1.0","params":{"LightSwitch":"test"},"method":"thing.event.property.post"}
[inf] MQTTPublish(515): Upstream Topic: '/sys/a6ciirK15iW/qWL7TtiX1V0yY5jht6uU/thing/event/property/post'
[inf] MQTTPublish(516): Upstream Payload:

> {
>     "id": "7",
>     "version": "1.0",
>     "params": {
>         "LightSwitch": "test"
>     },
>     "method": "thing.event.property.post"
> }

[inf] dm_client_publish(121): Publish Result: 0
[dbg] dm_msg_cache_insert(77): dmc list size: 0
user_post_property.431: Post Property Message ID: 7
[dbg] iotx_mc_cycle(1866): PUBLISH
[inf] iotx_mc_handle_recv_PUBLISH(1617): Downstream Topic: '/sys/a6ciirK15iW/qWL7TtiX1V0yY5jht6uU/thing/event/property/post_reply'
[inf] iotx_mc_handle_recv_PUBLISH(1618): Downstream Payload:

< {
<     "code": 200,
<     "data": {
<         "LightSwitch": "6309: tsl parse:  value of enum type must be int -> LightSwitch"
<     },
<     "id": "7",
<     "message": "success",
<     "method": "thing.event.property.post",
<     "version": "1.0"
< }
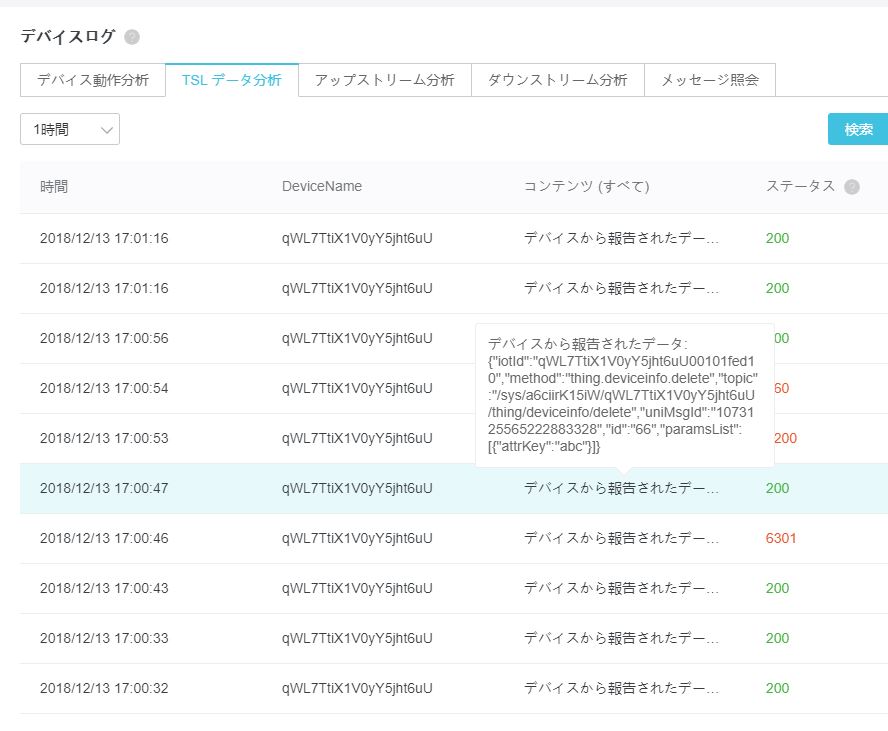
オンラインになっていることを確認できます。
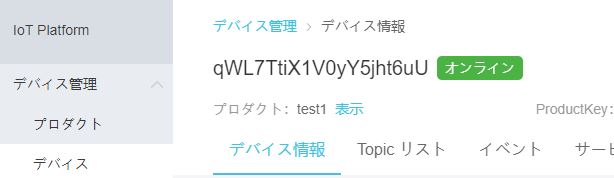
IoT Platform側にプッシュされていることも確認できます。
今回は接続まで確認できました。
案外、すんなりと利用できました。
Raspberry Piなんかにも簡単に実装できそうですね。