はじめに
Terraform Cloud が登場しました。
https://app.terraform.io/signup
何をするのかというとStateファイル(tfstate)を管理するものです。
個人や小規模チームで利用する場合は無料みたいです。
GitHubのTerraform Stateファイル版のようなものです。
利用までの過程をStep by Stepで見ていきたいと思います。
サインアップ
最初にサインアップは必要です。

ユーザー名、Email、パスワードを入力しアカウント作成します。
作成後は登録したEmail宛てに確認メールが送信されるので確認します。
アカウント作成後ログインします。
https://app.terraform.io
次にOrganaizationを作成します。
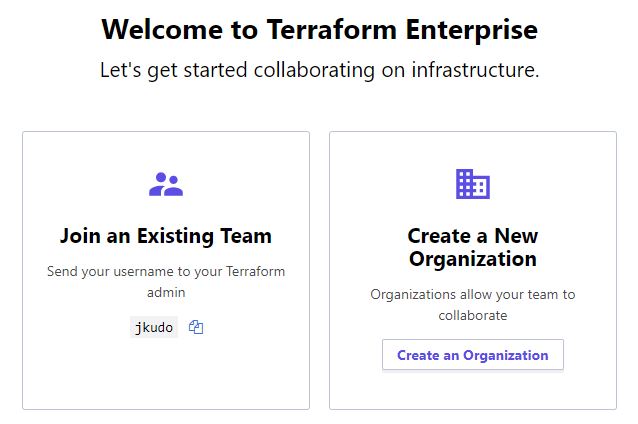
名前は既に利用されている場合は作成できないので注意が必要です。
Emailのアドレスを入力します。

以上でアカウントの準備は完了です。
Terraform Cloud と連携
以下はAWSにt2.microでubuntu18.04を立ち上げるサンプルコードです。
main.tf
メインになるtfファイル
variable "aws_access_key" {}
variable "aws_secret_key" {}
provider "aws" {
   access_key = "${var.aws_access_key}"
   secret_key = "${var.aws_secret_key}"
   region = "us-east-1"
}

resource "aws_instance" "tf-demo" {
   ami = "ami-0a313d6098716f372"
   instance_type = "t2.micro"
}
terraform.tfvars
アクセスキーとシークレットキー
aws_access_key = "XXXXXXXXXXXXXXXXXXXXXX"
aws_secret_key = "XXXXXXXXXXXXXXXXXXXXXXXXXXXXXXXXXXXXX"
remote-state.tf
作成したOrganaizationとWorkspacesを指定します。
Workspacesはない場合、新規作成されます。
WorkspacesはGitHubでいうレポジトリのようなものです。
terraform {
   backend "remote" {
      organization = "jkudo"
      workspaces {
         name = "example"
      }
   }
}
.terraformrc
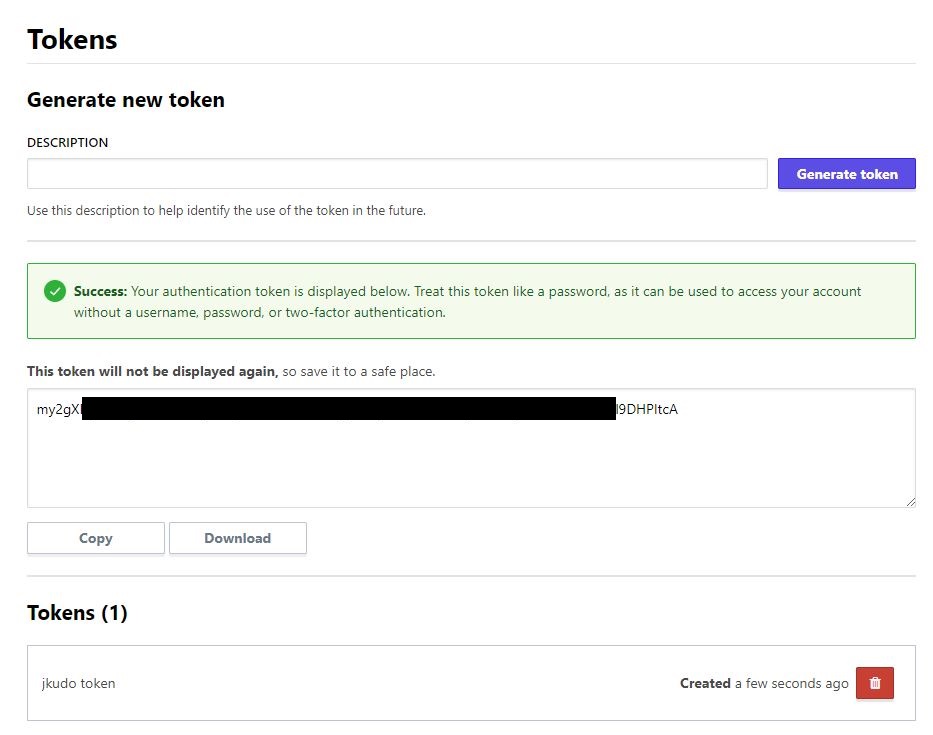
接続するためのtokenを指定します。
https://www.terraform.io/docs/commands/cli-config.html
ホームディレクトリにファイルを配置
credentials "app.terraform.io" {
  token = "my2gXPtytxcTag.atxxxxxxxxxxxxxxxxxxxxxxxxxxxxxxxxxxxxxxxxxxxQwot5pI7iI66zTYxkxJbzl9DHPItcA"
}
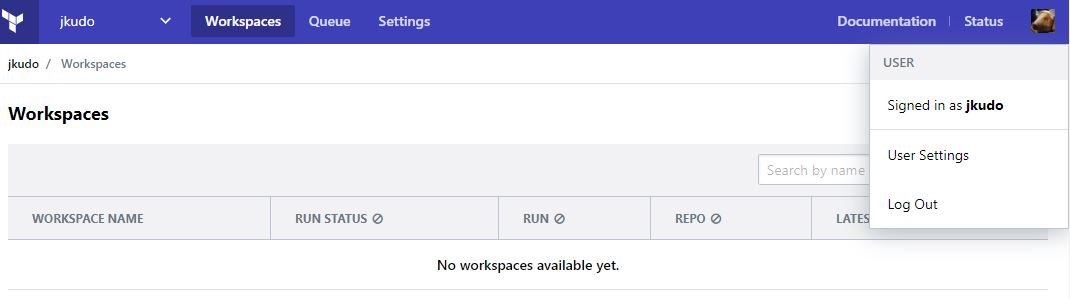
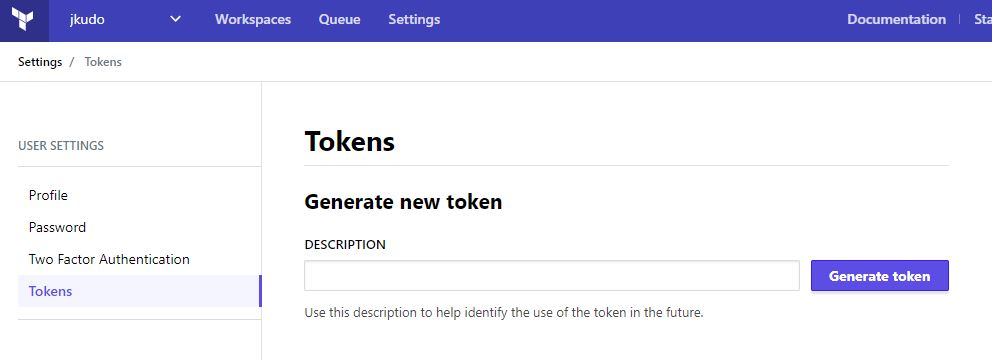
上記のTokenはメニューからWorkspacesに移動し、右上からUser Settingsを開きます。
メニューからTokensを開き、説明分を入力、作成します。
作成されてTokenを上記のファイル内で指定います。
以上で連携の準備は完了です。
次にinit(初期化)します。
注意:すでにローカルにStateファイルがある場合は0バイトになり中身が空っぽになります。
$ terraform init

Initializing the backend...
Backend configuration changed!

Terraform has detected that the configuration specified for the backend
has changed. Terraform will now check for existing state in the backends.


Successfully configured the backend "remote"! Terraform will automatically
use this backend unless the backend configuration changes.

Initializing provider plugins...

The following providers do not have any version constraints in configuration,
so the latest version was installed.

To prevent automatic upgrades to new major versions that may contain breaking
changes, it is recommended to add version = "..." constraints to the
corresponding provider blocks in configuration, with the constraint strings
suggested below.

* provider.aws: version = "~> 2.11"

Terraform has been successfully initialized!

You may now begin working with Terraform. Try running "terraform plan" to see
any changes that are required for your infrastructure. All Terraform commands
should now work.

If you ever set or change modules or backend configuration for Terraform,
rerun this command to reinitialize your working directory. If you forget, other
commands will detect it and remind you to do so if necessary.
init後にWorkspacesに指定したexampleが作成されます。

次にapplyします。
terraform apply

An execution plan has been generated and is shown below.
Resource actions are indicated with the following symbols:
  + create

Terraform will perform the following actions:

  + aws_instance.tf-demo
      id:                           < computed >
      ami:                          "ami-0a313d6098716f372"
      arn:                          < computed >
      associate_public_ip_address:  < computed >
      availability_zone:            < computed >
      cpu_core_count:               < computed >
      cpu_threads_per_core:         < computed >
      ebs_block_device.#:           < computed >
      ephemeral_block_device.#:     < computed >
      get_password_data:            "false"
      host_id:                      < computed >
      instance_state:               < computed >
      instance_type:                "t2.micro"
      ipv6_address_count:           < computed >
      ipv6_addresses.#:             < computed >
      key_name:                     < computed >
      network_interface.#:          < computed >
      network_interface_id:         < computed >
      password_data:                < computed >
      placement_group:              < computed >
      primary_network_interface_id: < computed >
      private_dns:                  < computed >
      private_ip:                   < computed >
      public_dns:                   < computed >
      public_ip:                    < computed >
      root_block_device.#:          < computed >
      security_groups.#:            < computed >
      source_dest_check:            "true"
      subnet_id:                    < computed >
      tenancy:                      < computed >
      volume_tags.%:                < computed >
      vpc_security_group_ids.#:     < computed >


Plan: 1 to add, 0 to change, 0 to destroy.

Do you want to perform these actions?
  Terraform will perform the actions described above.
  Only 'yes' will be accepted to approve.

  Enter a value: yes

aws_instance.tf-demo: Creating...
  ami:                          "" => "ami-0a313d6098716f372"
  arn:                          "" => "< computed >"
  associate_public_ip_address:  "" => "< computed >"
  availability_zone:            "" => "< computed >"
  cpu_core_count:               "" => "< computed >"
  cpu_threads_per_core:         "" => "< computed >"
  ebs_block_device.#:           "" => "< computed >"
  ephemeral_block_device.#:     "" => "< computed >"
  get_password_data:            "" => "false"
  host_id:                      "" => "< computed >"
  instance_state:               "" => "< computed >"
  instance_type:                "" => "t2.micro"
  ipv6_address_count:           "" => "< computed >"
  ipv6_addresses.#:             "" => "< computed >"
  key_name:                     "" => "< computed >"
  network_interface.#:          "" => "< computed >"
  network_interface_id:         "" => "< computed >"
  password_data:                "" => "< computed >"
  placement_group:              "" => "< computed >"
  primary_network_interface_id: "" => "< computed >"
  private_dns:                  "" => "< computed >"
  private_ip:                   "" => "< computed >"
  public_dns:                   "" => "< computed >"
  public_ip:                    "" => "< computed >"
  root_block_device.#:          "" => "< computed >"
  security_groups.#:            "" => "< computed >"
  source_dest_check:            "" => "true"
  subnet_id:                    "" => "< computed >"
  tenancy:                      "" => "< computed >"
  volume_tags.%:                "" => "< computed >"
  vpc_security_group_ids.#:     "" => "< computed >"
aws_instance.tf-demo: Still creating... (10s elapsed)
aws_instance.tf-demo: Still creating... (20s elapsed)
aws_instance.tf-demo: Still creating... (30s elapsed)
aws_instance.tf-demo: Still creating... (40s elapsed)
aws_instance.tf-demo: Creation complete after 41s (ID: i-0635401014174b440)

Apply complete! Resources: 1 added, 0 changed, 0 destroyed.
applyが完了すると通常、フォルダ内に作成されるstateファイルがTerraform Cloud上にアップロードされます。
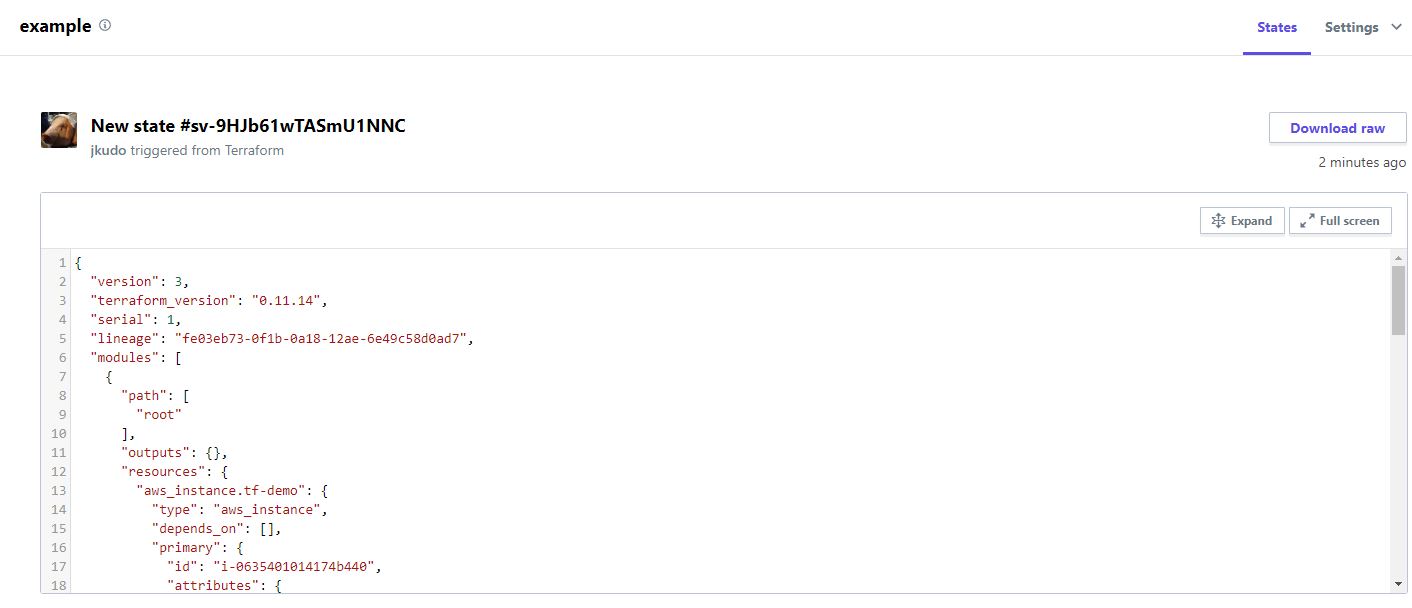
以上で動作の確認が行えました。
差分を確認
Terraform Cloud はGitHubに似たものなんで差分も表示してくれます。
試しにインスタンスサイズをt2.microからt2.smallに変更してみます。
main.tf
variable "aws_access_key" {}
variable "aws_secret_key" {}
provider "aws" {
   access_key = "${var.aws_access_key}"
   secret_key = "${var.aws_secret_key}"
   region = "us-east-1"
}

resource "aws_instance" "tf-demo" {
   ami = "ami-0a313d6098716f372"
   instance_type = "t2.small"
}
applyします。
$ terraform apply
aws_instance.tf-demo: Refreshing state... (ID: i-0635401014174b440)

An execution plan has been generated and is shown below.
Resource actions are indicated with the following symbols:
  ~ update in-place

Terraform will perform the following actions:

  ~ aws_instance.tf-demo
      instance_type: "t2.micro" => "t2.small"


Plan: 0 to add, 1 to change, 0 to destroy.

Do you want to perform these actions?
  Terraform will perform the actions described above.
  Only 'yes' will be accepted to approve.

  Enter a value: yes

aws_instance.tf-demo: Modifying... (ID: i-0635401014174b440)
  instance_type: "t2.micro" => "t2.small"
aws_instance.tf-demo: Still modifying... (ID: i-0635401014174b440, 10s elapsed)
aws_instance.tf-demo: Still modifying... (ID: i-0635401014174b440, 20s elapsed)
aws_instance.tf-demo: Still modifying... (ID: i-0635401014174b440, 30s elapsed)
aws_instance.tf-demo: Still modifying... (ID: i-0635401014174b440, 40s elapsed)
aws_instance.tf-demo: Still modifying... (ID: i-0635401014174b440, 50s elapsed)
aws_instance.tf-demo: Modifications complete after 52s (ID: i-0635401014174b440)
apply後にTerraform Cloudのコンソールから確認します。
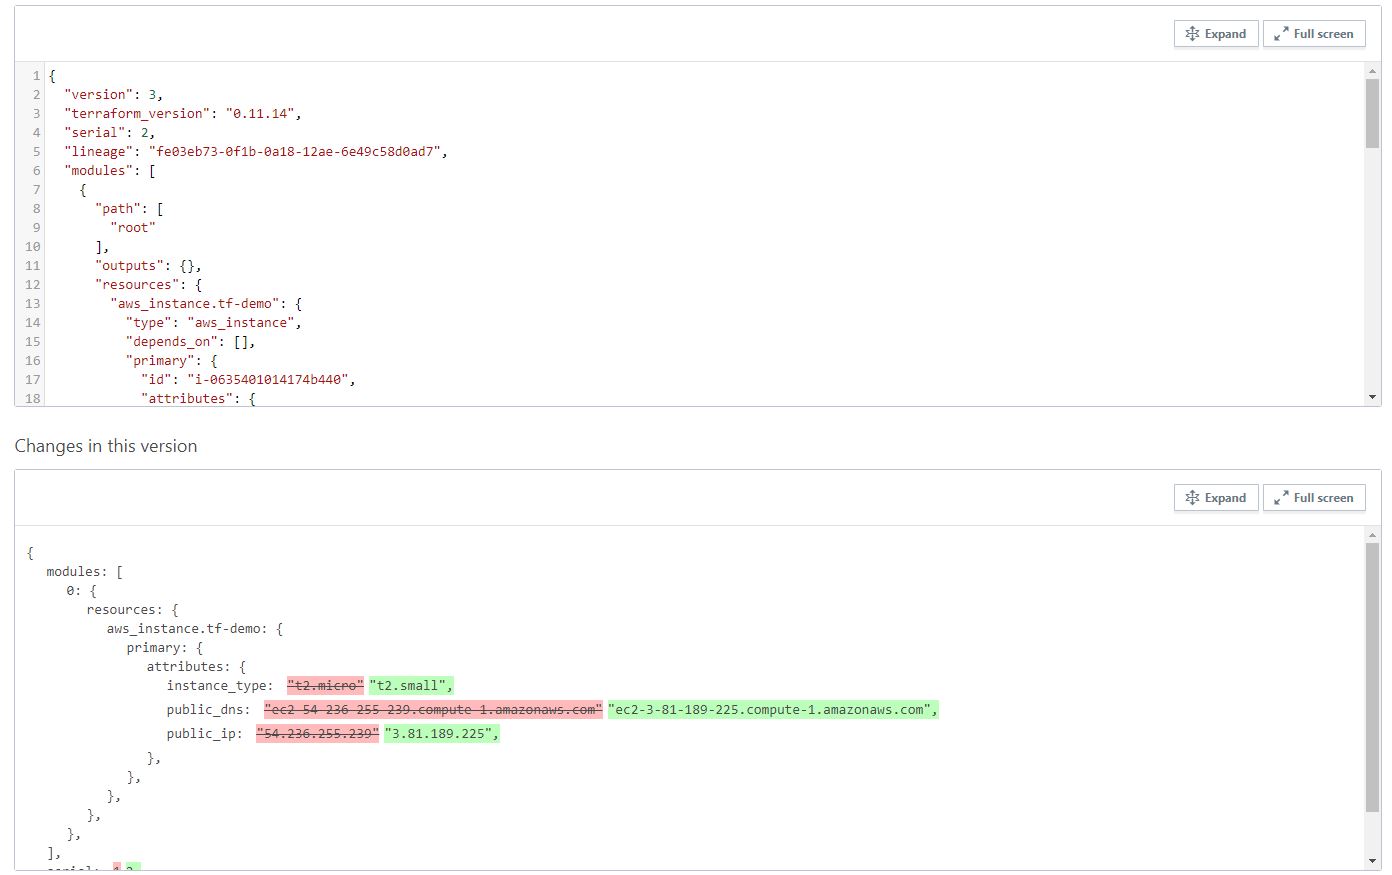
差分を表示してくれます。
ちなみに
ちなみにApply最中はロックされます。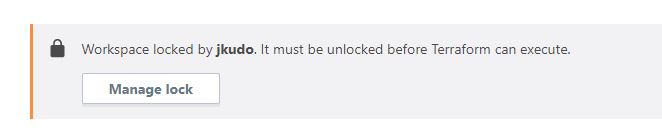
まとめ
Terraform CloudというStateをクラウド上に保存できるようになりました。これで、個人やチームでのTerraformの運用が楽になると思います。
また、GitHubライクな部分も導入しやすい感じがします。