はじめに
くどうです
4/12にLet’s EncryptがGAしました。
https://letsencrypt.org/2016/04/12/leaving-beta-new-sponsors.html
Let’s Encrypt は Azure Application Gateway でも利用可能です。
つまり無料で利用できる証明書をApplication Gatewayで使ってオフロードさせればいいじゃん!
AWSでいうELBと同じですね。少々面倒ですが・・・
ということで、一通りの手順を書いていきたいと思います。
手順はここを参考にしています。
https://azure.microsoft.com/ja-jp/documentation/articles/application-gateway-ssl-arm/
手順
以下の流れで進めていきます。
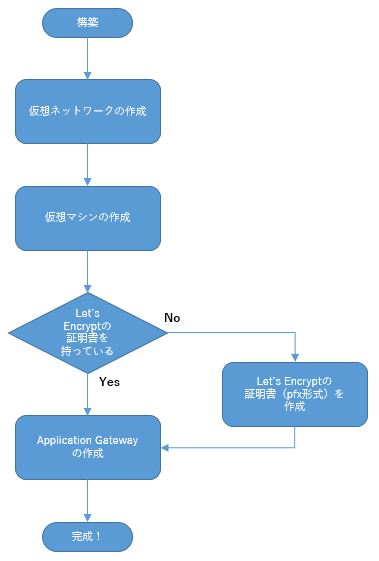
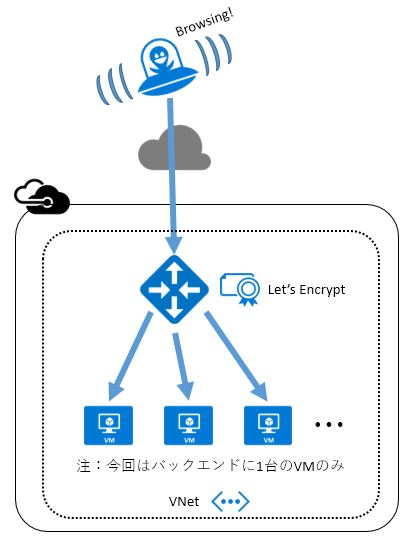
出来上がるのは下の図
仮想ネットワークの作成
最初に仮想マシン、Application Gateway を作成する仮想ネットワークを作成します。
リソースグループ「appgw-rg」が作成され、仮想ネットワーク「appgwvnet(10.0.0.0/16)」とサブネット「subnet01(10.0.0.0/24)」「subnet02(10.0.1.0/24)」が出来上がります。
注意事項として、Application Gatewayと同じサブネットに仮想マシンは立てることができません。正確にはNICを設置することができませんでした。
New-AzureRmResourceGroup -Name appgw-rg1010 -location "West US"
$subnet1 = New-AzureRmVirtualNetworkSubnetConfig -Name subnet01 -AddressPrefix 10.0.0.0/24
$subnet2 = New-AzureRmVirtualNetworkSubnetConfig -Name subnet02 -AddressPrefix 10.0.1.0/24
$vnet = New-AzureRmVirtualNetwork -Name appgwvnet -ResourceGroupName appgw-rg10 -Location "West US" -AddressPrefix 10.0.0.0/16 -Subnet $subnet1,$subnet2
仮想マシンの作成
仮想マシンは・・・ポータルから作った方が早いかも。
目的は、Let’s Encryptの証明書の発行およびsubnet02に配置しています。
IPアドレスは10.0.1.100にしています。
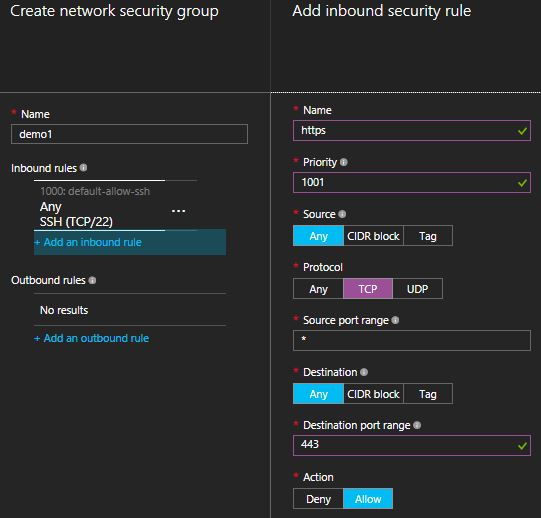
証明書の発行には443が開いている必要があります。セキュリティグループでルールを追加して作成します。
事前にLet’s Encryptの証明書をpfx形式で作成する必要があります。
既に持っているは「Application Gatewayの作成」まですっとぱして下さい。
Let’s Encrypt の証明書を発行
Let’s Encryptの証明書を発行するには、サーバーにクライアントソフトをインストールする必要があります。
下記を参考に進めます。
https://letsencrypt.org/getting-started/
Let’s EncryptはサーバーとFQDNで443通信が行えることで発行されます。
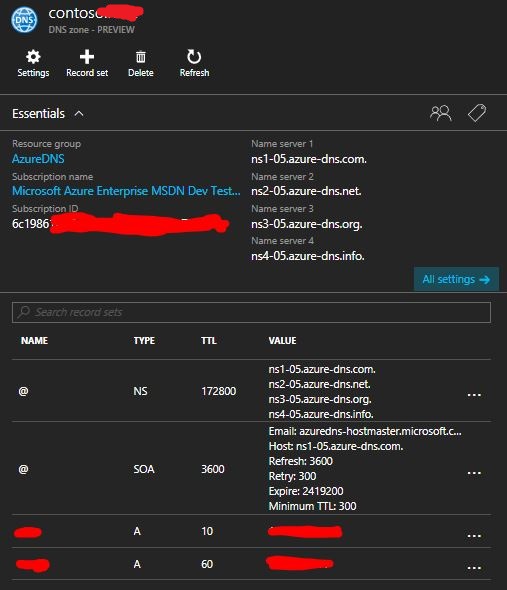
そのため、DNSの設定を事前に行う必要があります。
仮想マシンのIPをFQDNでAレコードとしてDNSへ追加します(設定は利用しているDNSをご確認ください)。
今回はAzureで完結するためAzure DNSで設定しています。
ここからが証明書の発行になります。
作成した仮想マシンにログインします。
必要なソフトをインストールします。
yum install git
git clone https://github.com/letsencrypt/letsencrypt
cd letsencrypt
./letsencrypt-auto --help
以下、注意が必要です。
CentOS6系だとうまくいきません。
Python2.7が必要となります。
Completeの後にエラーが出ます。
Complete!
Checking for new version...
Creating virtual environment...
./letsencrypt-auto: line 460: virtualenv: command not found
下記のコマンドでPython2.7をBashで利用できるようにします。
yum install -y centos-release-SCL

#install python 2.7 and scl utils
yum install scl-utils python27 python27-scldevel

#enable python 2.7 for bash
scl enable python27 bash
発行を行います。
./letsencrypt-auto certonly
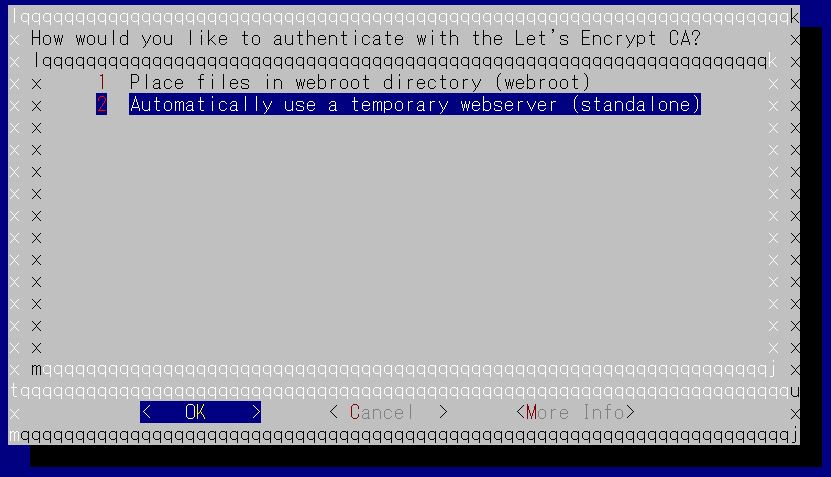
このサーバーでCAを利用しないので standalone を選択します。
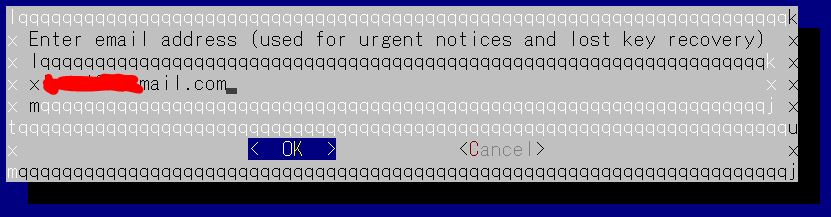
Eメールアドレスを入力します。
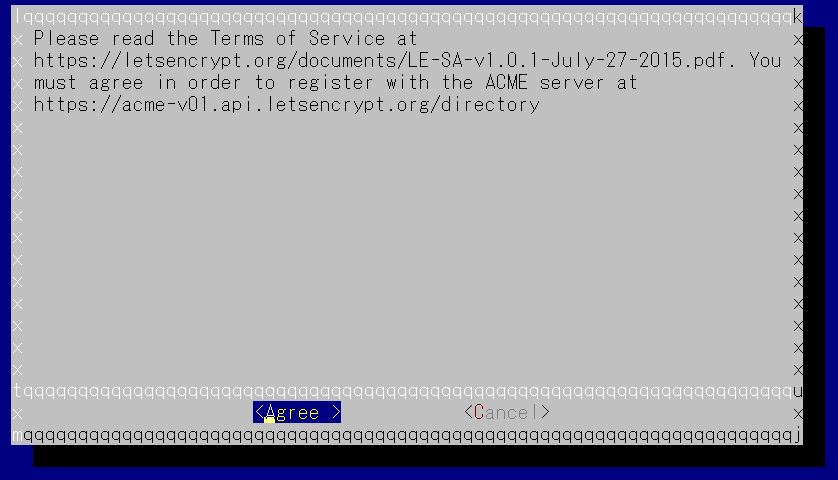
ACMEサーバーに登録することと、条項にAgreeするか。
ドメインを登録します。

完了するとファイルの場所などが表示されます。
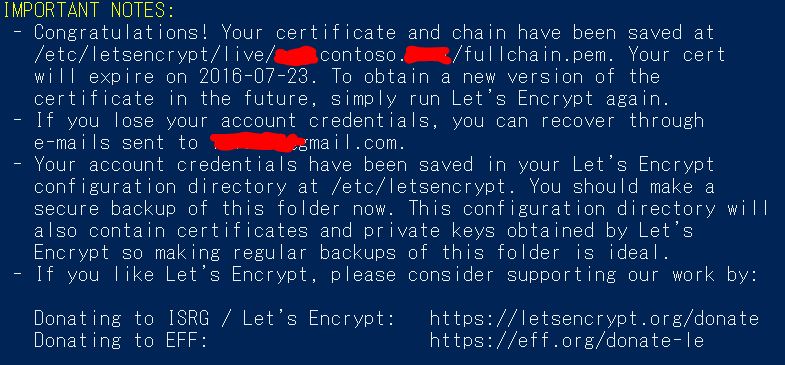
4つファイルがあることを確認します。
通常、/etc/letsencrypt/live/にファイルが作成されます。
# cd /etc/letsencrypt/live/xxxx.contoso.xxxxx/
# ls
cert.pem  chain.pem  fullchain.pem  privkey.pem
pfx形式に変換します。
# openssl pkcs12 -export -inkey privkey.pem -in cert.pem -out agw.pfx
Enter Export Password:
Verifying - Enter Export Password:
変換したファイルを作業しているPCへC:\tmp\agw.pfxとして保存します。
場所は任意です。その場合、Application Gatewayの作成時のパスも変更してください。
以上で、証明書の発行は完了です。
テストのためhttpdをインストールします。
# yum install -y httpd
Application Gatewayはindexを必要とします。
適当にindex.htmlを作成します。
# echo "web1" > /var/www/html/index.html
以上でテスト環境は完了です。
次にApplication Gatewayの作成を行います。
Application Gatewayの作成
Application Gatewayを作成しています。
流れ的に
・Public IPを作成
・Application GateWayにPublic IPを設定
・バックエンドアドレスプールを作成→実際にHTTPサーバーが動作しているIPアドレスを記述(複数ある場合は"192.168.1.1", "192.168.1.2"のように記述)
・バックエンドにポート、プロトコルを指定CookieBasedAffinity はEnabledにすることでクライアントからのセッションを同じ仮想マシンへ到達できるようにする
・フロントエンドのポートを指定
・証明書を設定(事前にLet’s Encryptのキーを作成する必要があります)
・証明書を読み込ませたリスナーを作成
・ルーティングを作成
・Sukを設定
・Application GateWayを作成
$subnet=$vnet.Subnets[0]
$publicip = New-AzureRmPublicIpAddress -ResourceGroupName appgw-rg10 -name publicIP01 -location "West US" -AllocationMethod Dynamic
$gipconfig = New-AzureRmApplicationGatewayIPConfiguration -Name gatewayIP01 -Subnet $subnet
$pool = New-AzureRmApplicationGatewayBackendAddressPool -Name pool01 -BackendIPAddresses 10.0.1.100
$poolSetting = New-AzureRmApplicationGatewayBackendHttpSettings -Name poolsetting01 -Port 80 -Protocol Http -CookieBasedAffinity Enabled
$fp = New-AzureRmApplicationGatewayFrontendPort -Name frontendport01  -Port 443
$cert = New-AzureRmApplicationGatewaySslCertificate -Name cert01 -CertificateFile C:\tmp\agw.pfx -Password xxxxxxxx
$fipconfig = New-AzureRmApplicationGatewayFrontendIPConfig -Name fipconfig01 -PublicIPAddress $publicip
$listener = New-AzureRmApplicationGatewayHttpListener -Name listener01  -Protocol Https -FrontendIPConfiguration $fipconfig -FrontendPort $fp -SslCertificate $cert
$rule = New-AzureRmApplicationGatewayRequestRoutingRule -Name rule01 -RuleType Basic -BackendHttpSettings $poolSetting -HttpListener $listener -BackendAddressPool $pool
$sku = New-AzureRmApplicationGatewaySku -Name Standard_Small -Tier Standard -Capacity 2
$appgw = New-AzureRmApplicationGateway -Name appgwtest -ResourceGroupName appgw-rg10 -Location "West US" -BackendAddressPools $pool -BackendHttpSettingsCollection $poolSetting -FrontendIpConfigurations $fipconfig  -GatewayIpConfigurations $gipconfig -FrontendPorts $fp -HttpListeners $listener -RequestRoutingRules $rule -Sku $sku -SslCertificates $cert
簡単でしょ?
作成まで、しばらく時間がかかります。
じっくり待ちます。
完了したらアクセスして確認してみましょう。
確認
最初にバックエンドのサーバーを確認してみます。
アクセスログを確認すると、Capacityを2に設定しているため、10.0.0.4と10.0.0.5の2台から確認されています。
# tail /var/log/httpd/access_log -f
10.0.0.4 - - [24/Apr/2016:15:07:51 +0000] "GET / HTTP/1.1" 200 5 "-" "-"
10.0.0.5 - - [24/Apr/2016:15:07:55 +0000] "GET / HTTP/1.1" 200 5 "-" "-"
10.0.0.4 - - [24/Apr/2016:15:08:21 +0000] "GET / HTTP/1.1" 200 5 "-" "-"
10.0.0.5 - - [24/Apr/2016:15:08:25 +0000] "GET / HTTP/1.1" 200 5 "-" "-"
10.0.0.4 - - [24/Apr/2016:15:08:51 +0000] "GET / HTTP/1.1" 200 5 "-" "-"
10.0.0.5 - - [24/Apr/2016:15:08:55 +0000] "GET / HTTP/1.1" 200 5 "-" "-"
対象のアドレスでSSLを確認すると、問題なくアクセスできることを確認します。
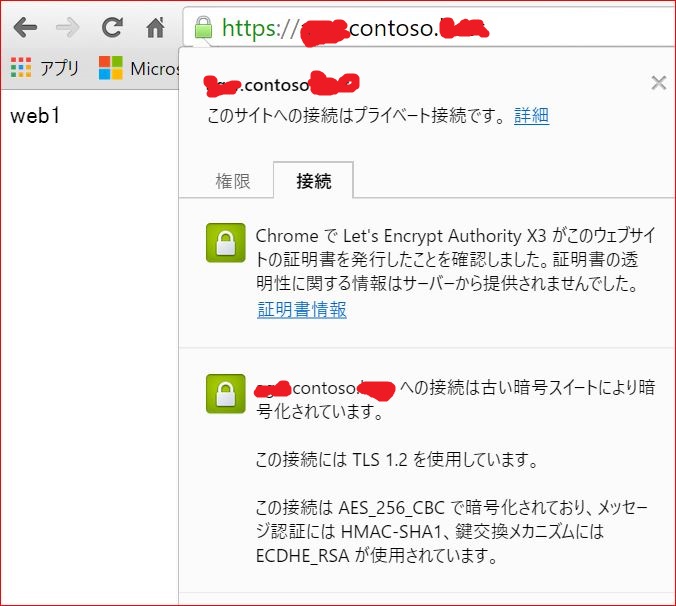
以上ですべて完了です。
まとめ
Let’s Encrypt は Azure Application Gatewayで利用できることを書きました。
やっていることは、Application Gatewayに証明書を埋め込んでいるのと一緒ですが、
今後、Let’s EncryptをAzureで利用する機会も増えてくると思うので、発行方法など参考にして頂ければと思います。
無料っていいですね!ではでは