WSLのUbuntuにpowerlineを導入する場合のTipsです。
powerlineはUIを格好よくしてくれるやつですね。
Windows Terminalで利用する場合です。
元ネタはHanselmanの記事です。
Powelineはこれです。
導入は元ネタと同じです。
GoをインストールしてからPowerlineをインストールします。
sudo apt install golang-go
go get -u github.com/justjanne/powerline-go
Bashの場合は以下を .bashrc の最後に追記します。
GOPATHが設定されいる場合は
GOPATH=$HOME/go
function _update_ps1() {
    PS1="$($GOPATH/bin/powerline-go -error $? -jobs $(jobs -p | wc -l))"
}

if [ "$TERM" != "linux" ] && [ -f "$GOPATH/bin/powerline-go" ]; then
    PROMPT_COMMAND="_update_ps1; $PROMPT_COMMAND"
fi
拡張されたフォントを導入する必要があります。通常Windows Terminalでは Cascadia Monoが初期フォントとして使われます。そこでCascadiaの拡張フォントを導入します。下記から最新版をダウンロードしてきます。
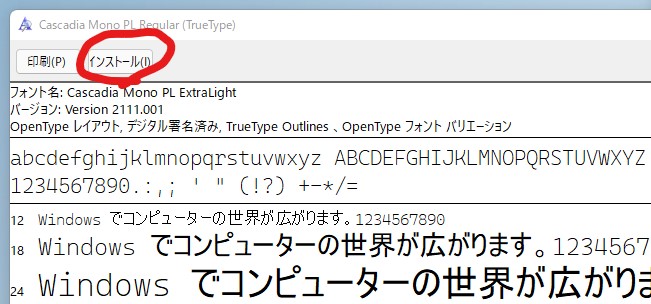
ダウンロード後に解凍して /ttf/CascadiaMonoPL.ttf を実行します。
インストールをクリックしてフォントを導入します。

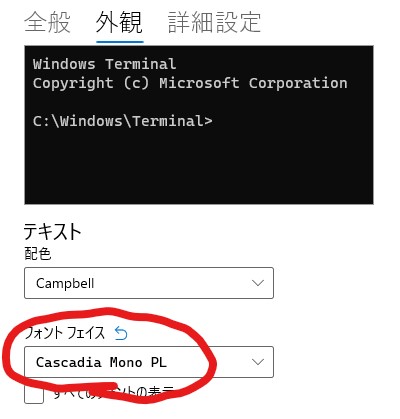
完了後はWindows Terminalを開きなおして設定で対象のディストリビューションの外観でフォントフェイスを変更します。

これで、文字化けもなくなります。

今回は見た目をかっこよくする話でした。

