はじめに
シンプルに簡単にキャッシュを実現するSaaSとして、MomentoがServerless Meetupで紹介されていたのでCLIを利用して試してみたいと思います。


Momento CLIは主にクライアントから確認するために利用すると思いますが、現状インストールはbrew で行います。そのためUbuntu(Linux)ではパッケージでのインストールが行えません。
追記 2022/04/21
LinuxとWindowsのCLIもリリースされました。これで、環境にとらわれずにMomentoを操作することが出来るようになりました!

WindowsユーザーはWSLで利用したいですね。
そこで方法としてソースからビルドして利用します。
WindowsでもRustなのでやろうと思えばVisual Studioを利用してできるのでは...
他にもMomentoを紹介されているブログがあります。


MomentoのサービスはAWS上に構成されており、AWSで利用するためにレスポンスも最適化されていると思いますが外部からも利用できます。
当然、Azureの仮想マシンでも動作します(確認済み)
CLIのビルド
Momento CLIはRustです。そのため、ビルドするにはRustの環境とコンパイルする環境をインストールする必要があります。
Rustのインストール
まず最初にRustをインストールします。途中にインストール方法を聞かれます「1」で進めます。
# curl https://sh.rustup.rs -sSf | sh
info: downloading installer

Welcome to Rust!

This will download and install the official compiler for the Rust
programming language, and its package manager, Cargo.

Rustup metadata and toolchains will be installed into the Rustup
home directory, located at:

/root/.rustup

This can be modified with the RUSTUP_HOME environment variable.

The Cargo home directory located at:

/root/.cargo

This can be modified with the CARGO_HOME environment variable.

The cargo, rustc, rustup and other commands will be added to
Cargo's bin directory, located at:

/root/.cargo/bin

This path will then be added to your PATH environment variable by
modifying the profile files located at:

/root/.profile
/root/.bashrc

You can uninstall at any time with rustup self uninstall and
these changes will be reverted.

Current installation options:

default host triple: x86_64-unknown-linux-gnu
default toolchain: stable (default)
profile: default
modify PATH variable: yes

1) Proceed with installation (default)
2) Customize installation
3) Cancel installation
>1

info: profile set to 'default'
info: default host triple is x86_64-unknown-linux-gnu
info: syncing channel updates for 'stable-x86_64-unknown-linux-gnu'
info: latest update on 2022-04-07, rust version 1.60.0 (7737e0b5c 2022-04-04)
info: downloading component 'cargo'
info: downloading component 'clippy'
info: downloading component 'rust-docs'
info: downloading component 'rust-std'
info: downloading component 'rustc'
info: downloading component 'rustfmt'
info: installing component 'cargo'
info: installing component 'clippy'
info: installing component 'rust-docs'
19.5 MiB / 19.5 MiB (100 %) 2.4 MiB/s in 7s ETA: 0s
info: installing component 'rust-std'
26.3 MiB / 26.3 MiB (100 %) 9.5 MiB/s in 4s ETA: 0s
info: installing component 'rustc'
54.6 MiB / 54.6 MiB (100 %) 7.8 MiB/s in 10s ETA: 0s
info: installing component 'rustfmt'
info: default toolchain set to 'stable-x86_64-unknown-linux-gnu'

stable-x86_64-unknown-linux-gnu installed - rustc 1.60.0 (7737e0b5c 2022-04-04)

Rust is installed now. Great!

To get started you may need to restart your current shell.
This would reload your PATH environment variable to include
Cargo's bin directory ($HOME/.cargo/bin).

To configure your current shell, run:
source $HOME/.cargo/env
source $HOME/.cargo/envを実行してPathを通します。ログインしなおしでもOK。
これでRustのインストールは完了です。簡単です。
本家では、こっちのコマンドが記載されています(やってることは変わらないです)。
curl --proto '=https' --tlsv1.2 -sSf https://sh.rustup.rs | sh
build-essentialをインストール
コンパイラにはgccなどが必要になります。gccのみインストールしbuildした場合にはエラーが発生します。
# cargo build

error: linker `cc` not found
必要な環境をまとめてインストールするためにbuild-essentialをインストールします。
# apt install build-essential
Reading package lists... Done
Building dependency tree
Reading state information... Done
The following additional packages will be installed:
binutils binutils-common binutils-x86-64-linux-gnu cpp cpp-9 dpkg-dev fakeroot g++ g++-9 gcc gcc-9 gcc-9-base libalgorithm-diff-perl libalgorithm-diff-xs-perl libalgorithm-merge-perl libasan5 libatomic1
libbinutils libc-dev-bin libc6-dev libcc1-0 libcrypt-dev libctf-nobfd0 libctf0 libdpkg-perl libfakeroot libfile-fcntllock-perl libgcc-9-dev libgomp1 libisl22 libitm1 liblsan0 libmpc3 libquadmath0
libstdc++-9-dev libtsan0 libubsan1 linux-libc-dev make manpages-dev
Suggested packages:
binutils-doc cpp-doc gcc-9-locales debian-keyring g++-multilib g++-9-multilib gcc-9-doc gcc-multilib autoconf automake libtool flex bison gdb gcc-doc gcc-9-multilib glibc-doc bzr libstdc++-9-doc make-doc
The following NEW packages will be installed:
binutils binutils-common binutils-x86-64-linux-gnu build-essential cpp cpp-9 dpkg-dev fakeroot g++ g++-9 gcc gcc-9 gcc-9-base libalgorithm-diff-perl libalgorithm-diff-xs-perl libalgorithm-merge-perl
Selecting previously unselected package manpages-dev.
Preparing to unpack .../40-manpages-dev_5.05-1_all.deb ...
Unpacking manpages-dev (5.05-1) ...
Setting up manpages-dev (5.05-1) ...
Setting up libfile-fcntllock-perl (0.22-3build4) ...
Setting up libalgorithm-diff-perl (1.19.03-2) ...
Setting up binutils-common:amd64 (2.34-6ubuntu1.3) ...
Setting up linux-libc-dev:amd64 (5.4.0-107.121) ...
Setting up libctf-nobfd0:amd64 (2.34-6ubuntu1.3) ...
Setting up libgomp1:amd64 (10.3.0-1ubuntu1~20.04) ...
Setting up libfakeroot:amd64 (1.24-1) ...
Setting up fakeroot (1.24-1) ...
update-alternatives: using /usr/bin/fakeroot-sysv to provide /usr/bin/fakeroot (fakeroot) in auto mode
Setting up make (4.2.1-1.2) ...
Setting up libquadmath0:amd64 (10.3.0-1ubuntu1~20.04) ...
Setting up libmpc3:amd64 (1.1.0-1) ...
Setting up libatomic1:amd64 (10.3.0-1ubuntu1~20.04) ...
Setting up libdpkg-perl (1.19.7ubuntu3) ...
Setting up libubsan1:amd64 (10.3.0-1ubuntu1~20.04) ...
Setting up libcrypt-dev:amd64 (1:4.4.10-10ubuntu4) ...
Setting up libisl22:amd64 (0.22.1-1) ...
Setting up libbinutils:amd64 (2.34-6ubuntu1.3) ...
Setting up libc-dev-bin (2.31-0ubuntu9.7) ...
Setting up libalgorithm-diff-xs-perl (0.04-6) ...
Setting up libcc1-0:amd64 (10.3.0-1ubuntu1~20.04) ...
Setting up liblsan0:amd64 (10.3.0-1ubuntu1~20.04) ...
Setting up libitm1:amd64 (10.3.0-1ubuntu1~20.04) ...
Setting up gcc-9-base:amd64 (9.4.0-1ubuntu1~20.04.1) ...
Setting up libalgorithm-merge-perl (0.08-3) ...
Setting up libtsan0:amd64 (10.3.0-1ubuntu1~20.04) ...
Setting up libctf0:amd64 (2.34-6ubuntu1.3) ...
Setting up libasan5:amd64 (9.4.0-1ubuntu1~20.04.1) ...
Setting up cpp-9 (9.4.0-1ubuntu1~20.04.1) ...
Setting up libc6-dev:amd64 (2.31-0ubuntu9.7) ...
Setting up binutils-x86-64-linux-gnu (2.34-6ubuntu1.3) ...
Setting up binutils (2.34-6ubuntu1.3) ...
Setting up dpkg-dev (1.19.7ubuntu3) ...
Setting up libgcc-9-dev:amd64 (9.4.0-1ubuntu1~20.04.1) ...
Setting up cpp (4:9.3.0-1ubuntu2) ...
Setting up gcc-9 (9.4.0-1ubuntu1~20.04.1) ...
Setting up libstdc++-9-dev:amd64 (9.4.0-1ubuntu1~20.04.1) ...
Setting up gcc (4:9.3.0-1ubuntu2) ...
Setting up g++-9 (9.4.0-1ubuntu1~20.04.1) ...
Setting up g++ (4:9.3.0-1ubuntu2) ...
update-alternatives: using /usr/bin/g++ to provide /usr/bin/c++ (c++) in auto mode
Setting up build-essential (12.8ubuntu1.1) ...
Processing triggers for man-db (2.9.1-1) ...
Processing triggers for libc-bin (2.31-0ubuntu9.7) ...
以上でビルドする環境は整いました。
CLIのビルド
準備が整ったらソースをダウンロードしてきます。
githubのmainブランチのバージョンとReleaseのバージョンは異なります。そのままCloneするとgithubが古いです。brewもgithub mainブランチとバージョンは同じっぽいです。
記事作成時(2022/04/09)
~/momento-cli/target/debug# ./momento -V
momento 0.11.9
~/archive-0.13.5/target/debug# ./momento -V
momento 0.13.5
github
git clone https://github.com/momentohq/momento-cli.git
cd momento-cli/
git clone https://github.com/momentohq/client-sdk-rust.git
レポジトリが分かれていることに気を付けてください。
--recursiveがなんかうまくいかなかったので。
Release
curl -OL https://github.com/momentohq/momento-cli/releases/download/v0.13.5/archive-0.13.5.tar.gz
バージョンによってファイル名が異なるため合わせてください。
ビルド
ReleasesのArchiveを利用します。
# tar zxvf archive-0.13.5.tar.gz
# cd ~/archive-0.13.5
# cargo build
Updating crates.io index
Downloaded syn v1.0.86
Downloaded rustls-pemfile v0.2.1
Downloaded tower-service v0.3.1
Downloaded which v4.2.4
Downloaded webpki v0.21.4
Downloaded webpki-roots v0.21.1

~(省略)~

Compiling momento v0.1.0 (/root/momento-cli/client-sdk-rust)
Compiling tonic v0.6.2
Compiling reqwest v0.11.9
Compiling momento-cli v0.11.9 (/root/momento-cli)
Finished dev [unoptimized + debuginfo] target(s) in 4m 25s
バージョンの確認
ビルドされたものは、~/archive-0.13.5/target/debugに出力されます。
# ./momento -V
momento 0.13.5
(2022/04/09)
ビルドしたものはパスの通ってる場所に置くとよいと思います。
以上でMomento CLIをUbuntuで利用する環境が整いました。
キャッシュしてみる
Momentoを利用するには、アカウントのサインアップと初期セットアップが必要となります。
サインアップ
利用できるリージョンはデフォルトがus-west-2です。他に us-east-1、 ap-northeast-1が利用できます。
Azureなど他の環境であえて利用する場合は、仮想マシンなどと近いリージョンを選択するとよいと思います。メールアドレス宛にトークンが発行されます。
# momento account signup --email xxxx@xxxx --region us-east-1
[2022-04-09T11:31:54Z INFO momento::commands::account] Signing up for Momento...
[2022-04-09T11:32:03Z INFO momento::commands::account] Success! Your access token will be emailed to you shortly.
初期セットアップ
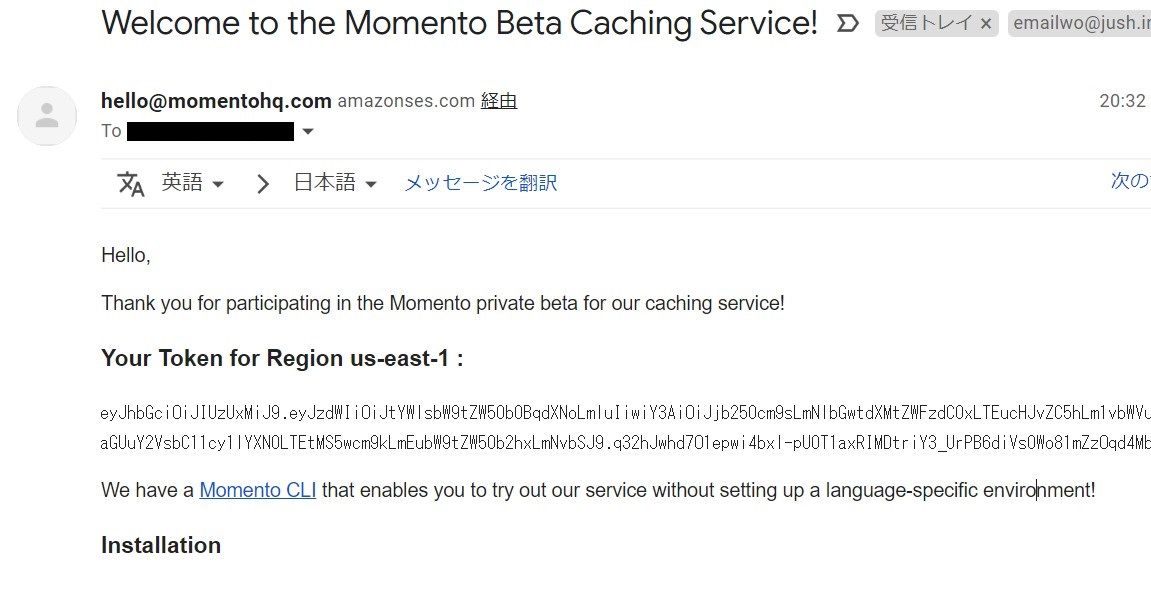
メールが送信されるので確認します。Tokenが含まれているので確認しておきます。
初期セットアップを行います。
Token、標準で利用するキャッシュ、TTLの設定を行います。
# momento configure
Token: eyJhbGciOiJIUzUxMiJ9.eyJzdxxxxxxxxxxxxxxxxxxxxxxxxxxxxxxxxxxxxxxxxxxxxxxxxxxxxxxxxxxxxxxxxxxxxxxxxxxxxxxxx
Default Cache [default-cache]:
Default Ttl Seconds [600]:
[2022-04-09T11:37:16Z INFO momento::commands::configure::configure_cli] default cache successfully created
キャッシュする
非常に簡単に利用することができます。
格納
# momento cache set --key key1 --value korehakey1novalue
set でkey1に値:korehakey1novalueを格納しています。
取得
# momento cache get --key key1
korehakey1novalue
get でkey1を取得しています。
キャッシュ時間
--ttlを指定すると個別に指定できます。
まとめ
個人的にMacを利用していないのでCLIをLinuxで動作させる方法を紹介しました。
Momentoは非常にシンプルで高速なレスポンスを重視したサービスです。あえてAzureで使っていますが 🙂
SDKも用意されているので、レスポンスさえ気にしなければクラウドプロバイダに依存せずに使えると思います。日本語でのサポートも問題ないです。
まだベータ版なのでこれからユースケースが増えていくことに期待です。また、Azureで使いたいってフィードバックをいっぱい送ればAzureでのリージョンも作ってくれるかも!