はじめに
前回はDocker HubのWebhookを利用して継続的デプロイを行う方法を紹介しました。ただし、Dockerイメージを自分でbuildする必要がありました。

これでは、開発者が更新のたびにbuildする手間が発生します。
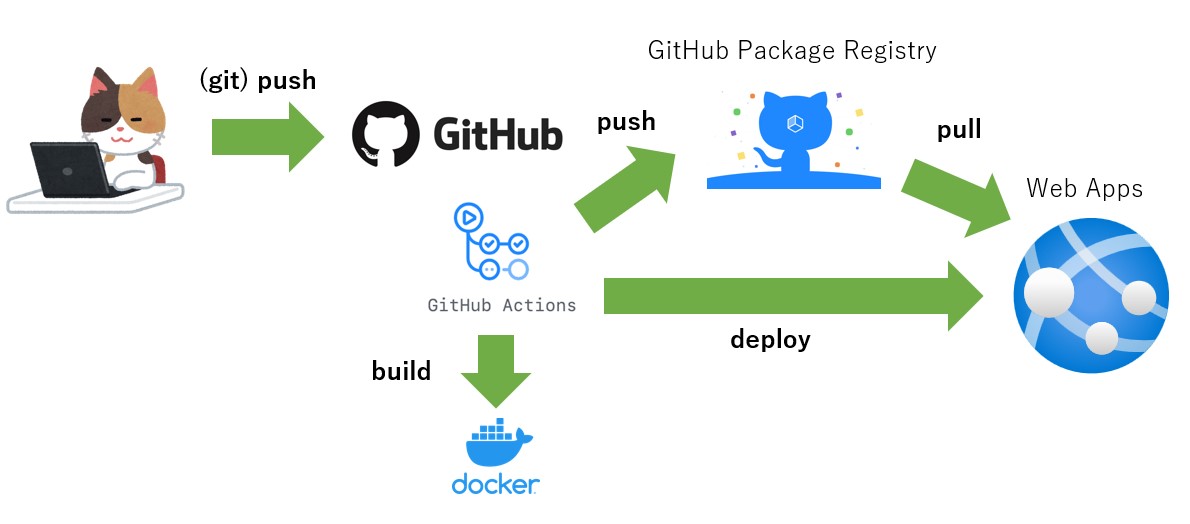
そこで、GitHub を利用した方法を紹介します。これはAzureの機能を利用するのではなくGitHub ActionsとGitHub Container Registryを利用した方法です。
そのため詳細はGitHub のドキュメントに書かれておりAzureのドキュメントにはありません。またこれはGitHub にWorkflow(テンプレート)が用意されています。
流れは下記のようになっています。
前提条件
- Web Apps for Containerの環境
- GitHub を利用できる環境
- Azureに対する基本的知識
- GitHub に対する基本的知識
- Azure、GitHub アカウント
下記はテスト環境です。
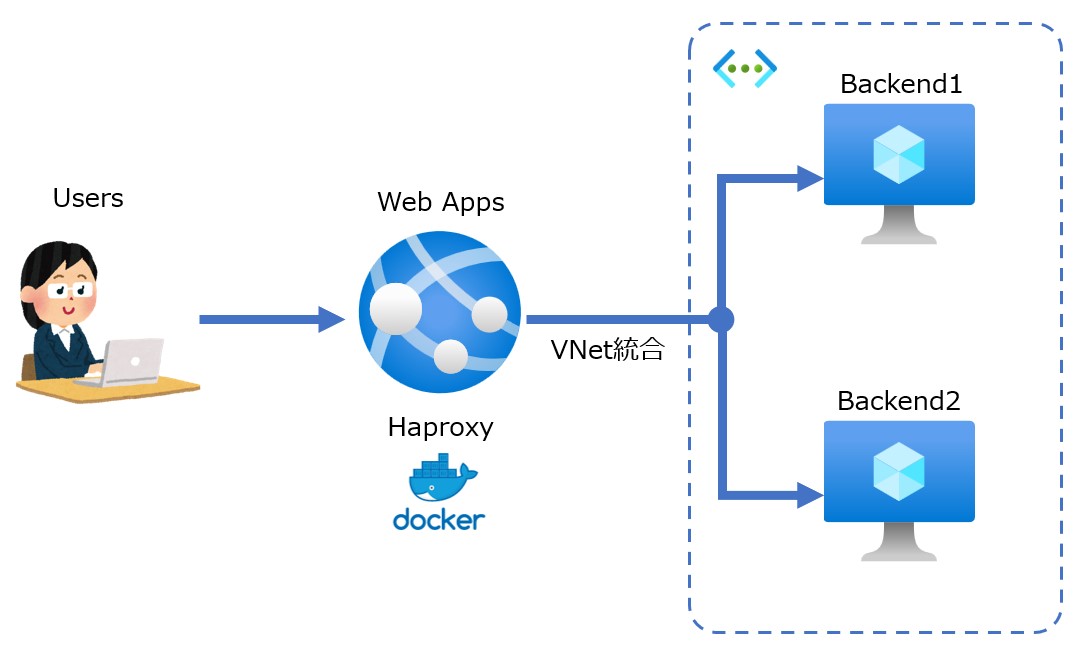
構築手順については過去記事を参考
GitHub Actions
GitHub Actionsで設定を行います。
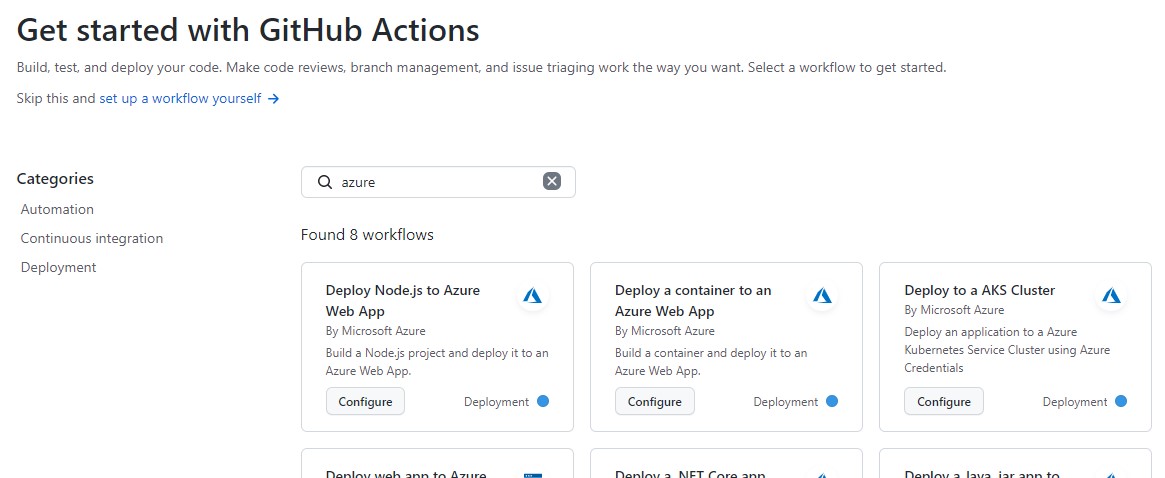
Actionsを開きます。
検索窓で「azure」で検索します。
表示される中で、Deploy a container to an Azure Web Appを設定します。
azure-container-webapp.ymlを追加されます(commit押して追加)
保存しても構いませんし、別タブで設定をおこなっても良いです。
下記のように設定方法が記載されています。
# This workflow will build and push a Docker container to an Azure Web App when a commit is pushed to your default branch.
#
# This workflow assumes you have already created the target Azure App Service web app.
# For instructions see https://docs.microsoft.com/en-us/azure/app-service/quickstart-custom-container?tabs=dotnet&pivots=container-linux
#
# To configure this workflow:
#
# 1. Download the Publish Profile for your Azure Web App. You can download this file from the Overview page of your Web App in the Azure Portal.
#    For more information: https://docs.microsoft.com/en-us/azure/app-service/deploy-github-actions?tabs=applevel#generate-deployment-credentials
#
# 2. Create a secret in your repository named AZURE_WEBAPP_PUBLISH_PROFILE, paste the publish profile contents as the value of the secret.
#    For instructions on obtaining the publish profile see: https://docs.microsoft.com/azure/app-service/deploy-github-actions#configure-the-github-secret
#
# 3. Create a GitHub Personal access token with "repo" and "read:packages" permissions.
#
# 4. Create three app settings on your Azure Web app:
#       DOCKER_REGISTRY_SERVER_URL: Set this to "https://ghcr.io"
#       DOCKER_REGISTRY_SERVER_USERNAME: Set this to the GitHub username or organization that owns the repository
#       DOCKER_REGISTRY_SERVER_PASSWORD: Set this to the value of your PAT token from the previous step
#
# 5. Change the value for the AZURE_WEBAPP_NAME.
#
# For more information on GitHub Actions for Azure: https://github.com/Azure/Actions
# For more information on the Azure Web Apps Deploy action: https://github.com/Azure/webapps-deploy
# For more samples to get started with GitHub Action workflows to deploy to Azure: https://github.com/Azure/actions-workflow-samples
順番に実行していきます。
最初に発行プロファイルの取得します。ダウンロードします。中身はテキストファイルで認証の情報を含んでいます。

GitHub でSercretsを作成します。
Actionsのシークレットです。
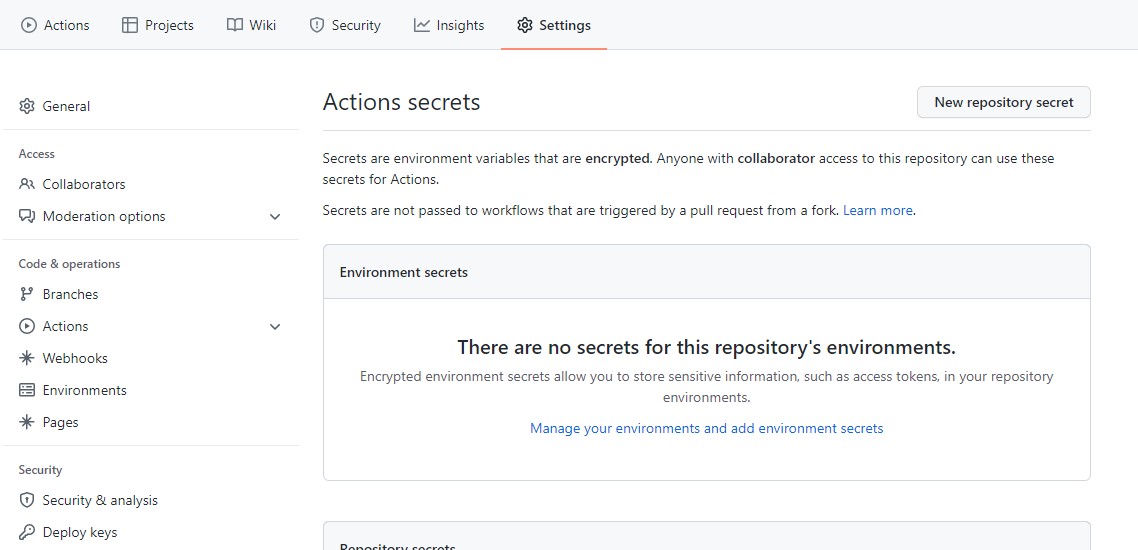
- Name:AZURE_WEBAPP_PUBLISH_PROFILE
- Value:発行プロファイルの中身をすべて貼り付けます
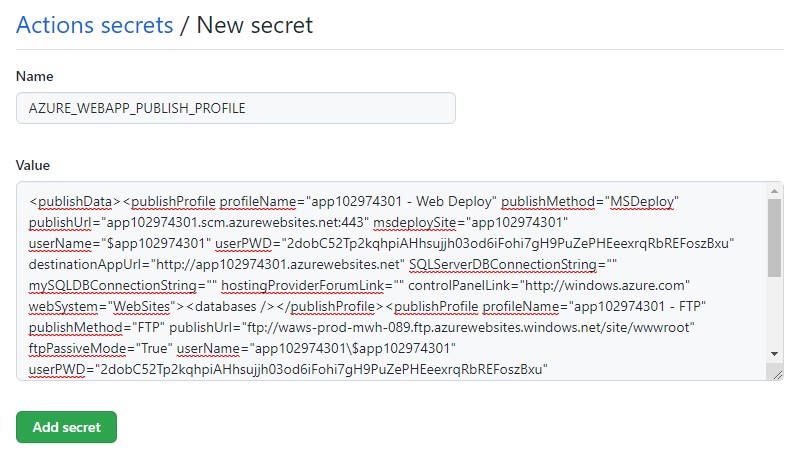
保存します。
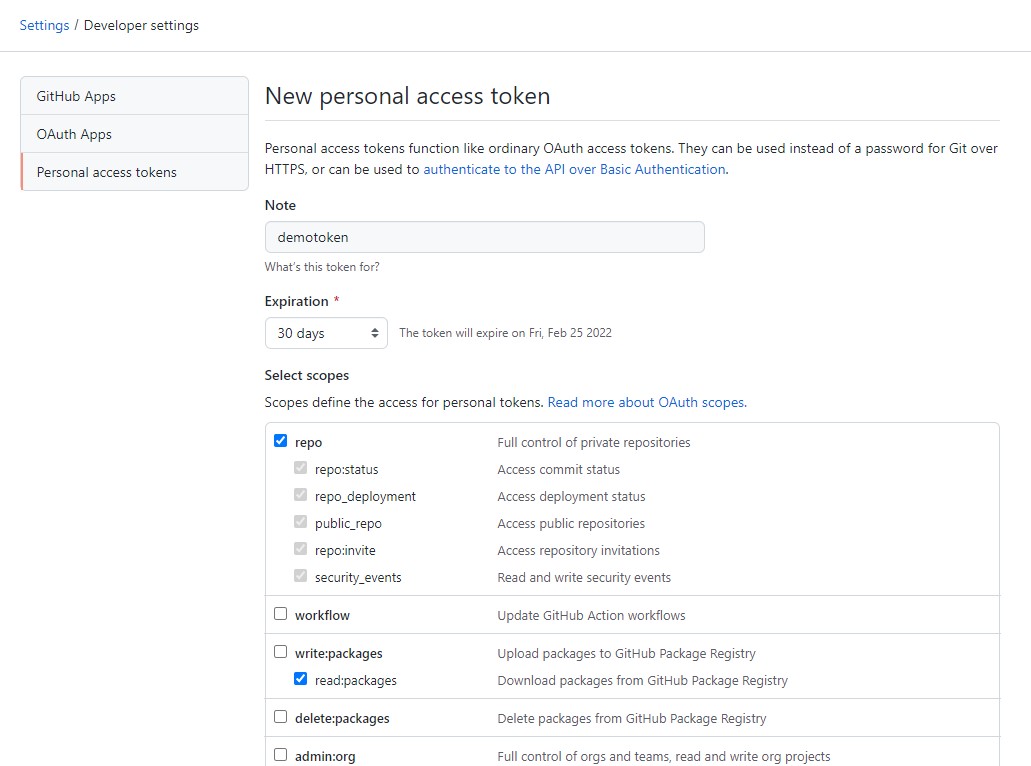
次にGitHub Personal access tokenを発行します。
GitHubの設定を開きます。
左のメニューから一番下のDeveloper settingsを開きます。
Personal access tokensを開きます。
新しくtokenを作成します。
以下の権限を与えるtokenを作成します。
- repo
- read:packages
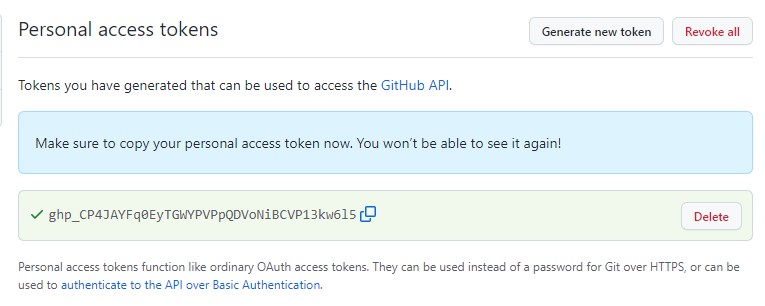
発行された Tokenはメモしておきます。あとで見ることはできないので注意が必要です。
次にAzureポータルからデプロイするWeb Appsを開き、構成を開きます。
新しいアプリケーション設定を追加します。
- DOCKER_REGISTRY_SERVER_URL:https://ghcr.io
- DOCKER_REGISTRY_SERVER_USERNAME:GitHubのユーザー名
- DOCKER_REGISTRY_SERVER_PASSWORD:上記でメモしたToken
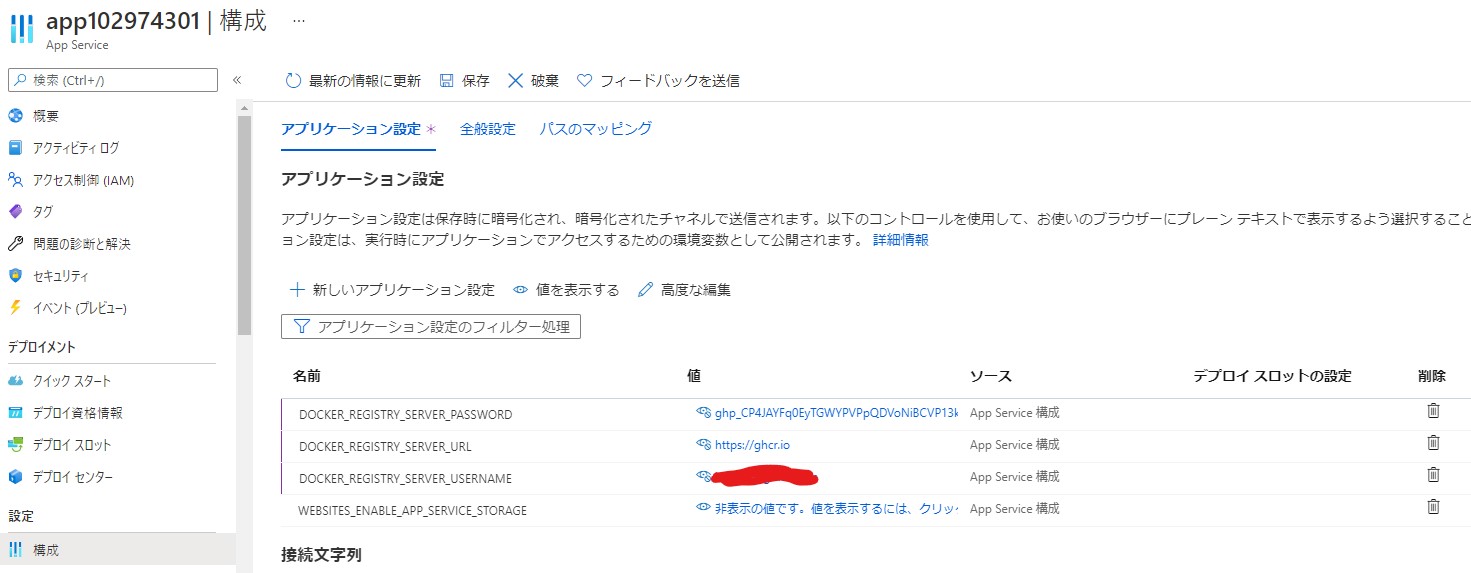
保存します。
azure-container-webapp.ymlを変更します。
env:
  AZURE_WEBAPP_NAME: your-app-name  # set this to the name of your Azure Web App
your-app-name をデプロイするWeb Appsの名前に変更します。
env:
  AZURE_WEBAPP_NAME: app102974301  # set this to the name of your Azure Web App
以上ですべての設定は終わりです。
デプロイ
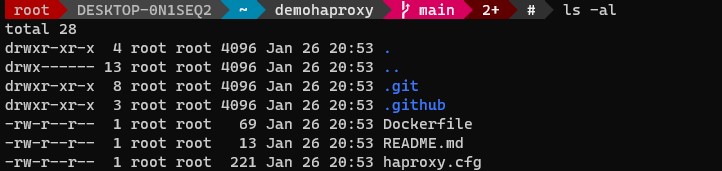
レポジトリをgit cloneします。
そして、Haproxyをbuildするために必要なファイルを追加します。
ここでは、Dockerfileとhaproxy.cfgを追加します。
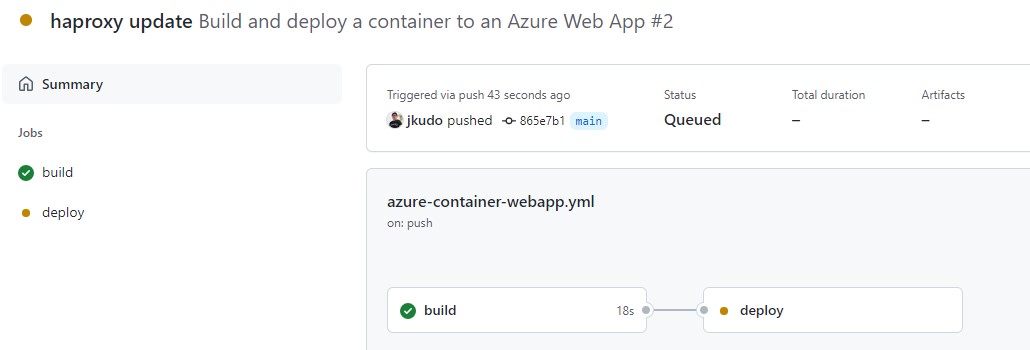
push した後にGitHub Actionsを確認します。Workflowが走っていることを確認します。
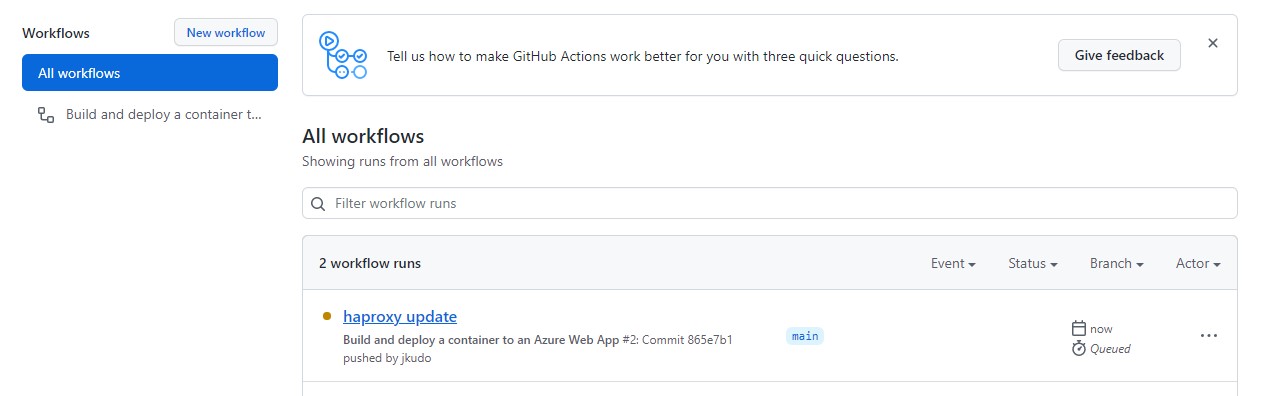
詳細を確認してDeployが完了するまで待ちます。エラーが出た場合は設定を確認してください。
デプロイの確認
最初に問題なくデプロイされていることを確認します。
 # curl https://app102974301.azurewebsites.net
backend1
Backend1にアクセスできています。
Haproxyの設定ファイルを変更しBackend2に通信するように変更しpushします。
数分待ちます。
 # curl https://app102974301.azurewebsites.net
backend2

設定が反映されていることを確認します。
以上で確認も完了です。
まとめ
意外とシンプルに構成が組めます。難しいイメージの強いCICD周りの設定ですが設定項目もすくなく、テンプレートが用意されているので簡単に実行することが可能です。
インフラ屋にはちょっとイメージ付かないところも多いんですよね。CICDって・・・
今回はGitHub Actionsを利用した方法の一つを紹介しました。他にもGitHub Actionsを利用した方法はありますので次回以降に紹介したいと思います。