はじめに
Azure仮想マシンではUbutun Serverが提供されています。これを無料版 Ubuntu Proにアップグレードしてみたいと思います。
個人、小規模商用版では無料で利用できるとのことなので試してみたいと思います。
サインアップ
最初に、Ubuntu Proをアクティベートするためのトークンを取得します。
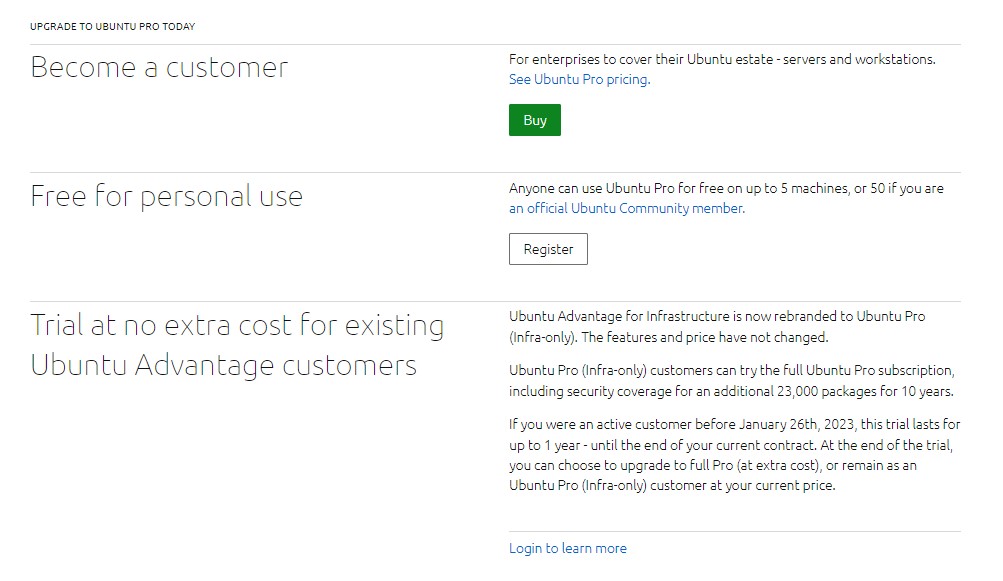
下記より中付近にある Free for personal user から Register(登録)します。

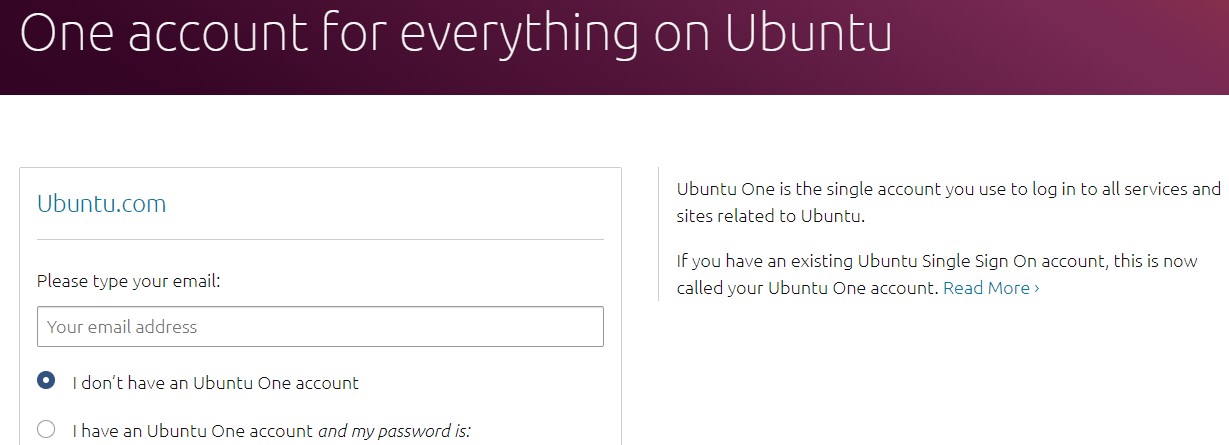
アカウントがない場合は作成します。メールの確認などが行われます。

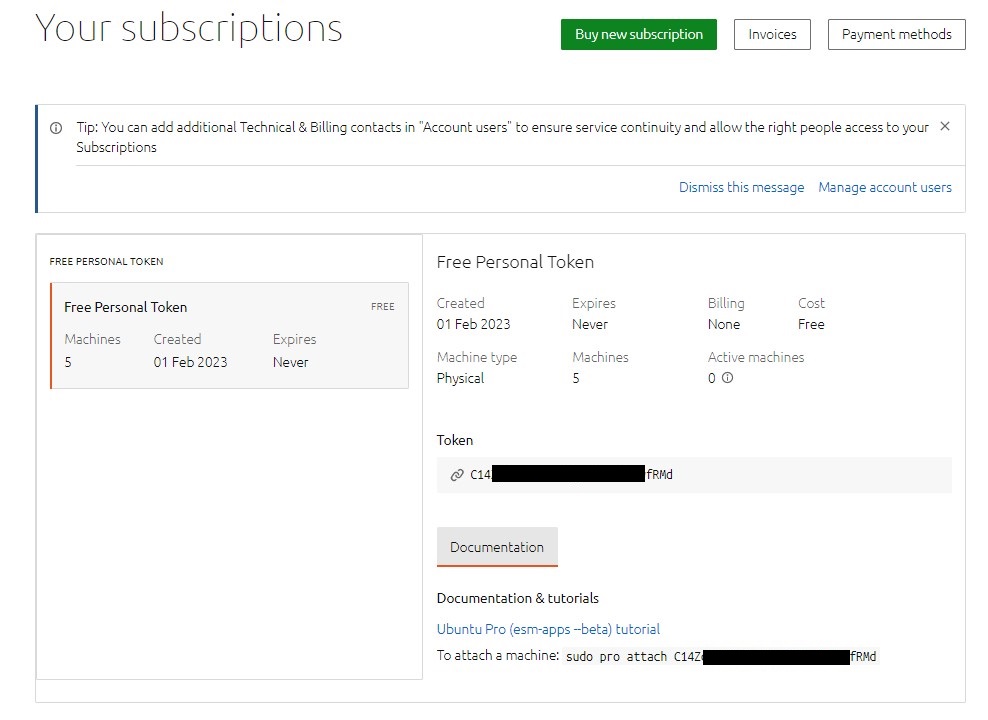
認証が行えるようになるとサブスクリプションを確認することができます。
ライセンスの種類とトークンを確認できます。また登録されている台数も確認できます。

トークンを適用
検証を行う環境としてUbuntu Server 22.04を仮想マシンとして立ち上げています。
トークンを適用するには下記のコマンドを実行します。
pro attach [トークン]
結果として以下の以下のようにExpanded Security とLivepatchが有効かされます。
# pro attach C14ZxxxxxxxxxxxxxxxxxxxxxwfRMd
Enabling default service esm-apps
Updating package lists
Ubuntu Pro: ESM Apps enabled
Enabling default service esm-infra
Updating package lists
Ubuntu Pro: ESM Infra enabled
Enabling default service livepatch
Installing canonical-livepatch snap
Canonical livepatch enabled.
This machine is now attached to 'Ubuntu Pro - free personal subscription'

SERVICE          ENTITLED  STATUS    DESCRIPTION
esm-apps         yes       enabled   Expanded Security Maintenance for Applications
esm-infra        yes       enabled   Expanded Security Maintenance for Infrastructure
livepatch        yes       enabled   Canonical Livepatch service
realtime-kernel  yes       disabled  Ubuntu kernel with PREEMPT_RT patches integrated

NOTICES
Operation in progress: pro attach

Enable services with: pro enable <service>

     Account: yyyyy@xxxxxx.com
Subscription: Ubuntu Pro - free personal subscription
トークンがアタッチされたか確認します。
pro security-status
# pro security-status
615 packages installed:
    610 packages from Ubuntu Main/Restricted repository
    3 packages from Ubuntu Universe/Multiverse repository
    2 packages from third parties

To get more information about the packages, run
    pro security-status --help
for a list of available options.

This machine is attached to an Ubuntu Pro subscription.

Main/Restricted packages are receiving security updates from
Ubuntu Pro with 'esm-infra' enabled until 2032.

Universe/Multiverse packages are receiving security updates from
Ubuntu Pro with 'esm-apps' enabled until 2032.
有効かされたExpanded Securityを確認します。
apt update
結果としてesm.ubuntu.comが追加されていることがわかります。
ただしここでKey is stored in legacy trusted.gpg keyring と警告が出ていることがわかります。
# apt update
Hit:1 http://azure.archive.ubuntu.com/ubuntu jammy InRelease
Hit:2 http://azure.archive.ubuntu.com/ubuntu jammy-updates InRelease
Get:3 http://azure.archive.ubuntu.com/ubuntu jammy-backports InRelease [99.8 kB]
Hit:4 http://azure.archive.ubuntu.com/ubuntu jammy-security InRelease
Hit:5 https://packages.microsoft.com/ubuntu/22.04/prod jammy InRelease
Hit:6 https://esm.ubuntu.com/apps/ubuntu jammy-apps-security InRelease
Hit:7 https://esm.ubuntu.com/apps/ubuntu jammy-apps-updates InRelease
Hit:8 https://esm.ubuntu.com/infra/ubuntu jammy-infra-security InRelease
Hit:9 https://esm.ubuntu.com/infra/ubuntu jammy-infra-updates InRelease
Fetched 99.8 kB in 1s (93.5 kB/s)
Reading package lists... Done
Building dependency tree... Done
Reading state information... Done
9 packages can be upgraded. Run 'apt list --upgradable' to see them.
W: https://packages.microsoft.com/ubuntu/22.04/prod/dists/jammy/InRelease: Key is stored in legacy trusted.gpg keyring (/etc/apt/trusted.gpg), see the DEPRECATION section in apt-key(8) for details.
この警告の解消方法については下記に説明しています。
最初に gpg キーを確認します。
# apt-key list
Warning: apt-key is deprecated. Manage keyring files in trusted.gpg.d instead (see apt-key(8)).
/etc/apt/trusted.gpg
--------------------
pub   rsa2048 2015-10-28 [SC]
      BC52 8686 B50D 79E3 39D3  721C EB3E 94AD BE12 29CF
uid           [ unknown] Microsoft (Release signing) <gpgsecurity@microsoft.com>

/etc/apt/trusted.gpg.d/ubuntu-advantage-esm-apps.gpg
----------------------------------------------------
pub   rsa4096 2019-11-21 [SC]
      E8A4 43CE 3581 13D1 87BE  E0E6 AB01 A101 DB53 907B
uid           [ unknown] Ubuntu Apps Automatic Signing Key <esm@canonical.com>
sub   rsa4096 2019-11-21 [E]

/etc/apt/trusted.gpg.d/ubuntu-advantage-esm-infra-trusty.gpg
------------------------------------------------------------
pub   rsa4096 2019-04-17 [SC]
      56F7 650A 24C9 E9EC F87C  4D8D 4067 E403 13CB 4B13
uid           [ unknown] Ubuntu Extended Security Maintenance Automatic Signing Key v2 <esm@canonical.com>
sub   rsa4096 2019-04-17 [E]

/etc/apt/trusted.gpg.d/ubuntu-keyring-2012-cdimage.gpg
------------------------------------------------------
pub   rsa4096 2012-05-11 [SC]
      8439 38DF 228D 22F7 B374  2BC0 D94A A3F0 EFE2 1092
uid           [ unknown] Ubuntu CD Image Automatic Signing Key (2012) <cdimage@ubuntu.com>

/etc/apt/trusted.gpg.d/ubuntu-keyring-2018-archive.gpg
------------------------------------------------------
pub   rsa4096 2018-09-17 [SC]
      F6EC B376 2474 EDA9 D21B  7022 8719 20D1 991B C93C
uid           [ unknown] Ubuntu Archive Automatic Signing Key (2018) <ftpmaster@ubuntu.com>
ここで問題になっているキーは/etc/apt/trusted.gpgです。
これを末尾を指定し下記のようにエクスポートします。
apt-key export BE1229CF | sudo gpg --dearmour -o /usr/share/keyrings/microsoft.gpg
# apt-key export BE1229CF | sudo gpg --dearmour -o /usr/share/keyrings/microsoft.gpg
Warning: apt-key is deprecated. Manage keyring files in trusted.gpg.d instead (see apt-key(8)).
次にレポジトリのリスト /etc/apt/sources.list.d/microsoft-prod.listを編集します。
下記のように編集します。
# vi /etc/apt/sources.list.d/microsoft-prod.list
deb [arch=amd64,armhf,arm64 signed-by=/usr/share/keyrings/microsoft.gpg] https://packages.microsoft.com/ubuntu/22.04/prod jammy main
設定後に apt update && apt upgrade を行います。
警告が出ていないことを確認します。しかし、not upgradedがあります。これを解消するには対象を指定し直接インストールする必要があります。
The following packages have been kept back:
  grub-efi-amd64-bin grub-efi-amd64-signed kbd libdrm-common libdrm2 python3-software-properties snapd software-properties-common update-notifier-common
0 upgraded, 0 newly installed, 0 to remove and 9 not upgraded.
指定してインストールします。
apt install grub-efi-amd64-bin grub-efi-amd64-signed kbd libdrm-common libdrm2 python3-software-properties snapd software-properties-common update-notifier-common
アップグレードが行えたことがわかります。
0 upgraded, 0 newly installed, 0 to remove and 0 not upgraded.
以上でProへの変更は完了です。
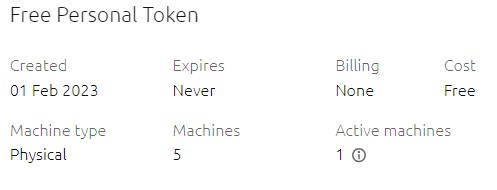
サブスクリプションを確認すると、Active Machinesが1になっていることをわかります。

まとめ
仮想マシンの通常版Ubuntuを無料版のProに変更する方法を紹介しました。基本的にAzureに限った話ではなくほかの環境でも作業は同様だと思います。個人で利用する環境ではProに変更するのも一つの手かもしれません。

